|
Weather Weather might seem like an odd thing to have a Theme Day about but it does play an important part of everyday life. In fact, my kids ask me every morning to check the weather so they can choose what clothes to wear. Looking at the weather is also another way of exploring the seasons and Science minded kids might especially like to investigate weather through various experiments. So whatever the weather, there is sure to be some element of this Theme Day to suit your family! Print out the Family Theme Day Planner and decide which activities you’d like to do and in what order.
INTRODUCTORY DISCUSSION: If your child is particularly afraid of storms you could use this as a way to help him/her understand the weather better and perhaps conquer his/her fears. I have included a Family Brainstorm Worksheet about storm safety which might be useful for older children and their fears. One of my friends taught her child how to recognize the types of clouds and that seemed to help him. Obviously, if your child is particularly sensitive to this topic and is very agitated by any discussion of thunder and lightning or tornados you could make your focus on “nicer” weather and deal specifically with sunshine and perhaps snow or light rains.
SONGS: Wow! Are there ever a lot of songs about the weather! Here are just a few (all about rain coincidentally)… “I love a Rainy Night,” by Eddie Rabbit; “Have You Ever Seen the Rain,” by Creedence Clearwater Revival; “Singin’ In the Rain,” by Gene Kelly; “Raindrops Keep Falling on my Head,” by B.J. Thomas There are many children’s songs about the weather like “It’s raining it’s pouring,” (check here for lyrics: http://www.kididdles.com/lyrics/i028.html) “Rain, rain go away,” (Lyrics: http://www.kididdles.com/lyrics/r003.html), and “If all the raindrops were lemon drop.” (Lyrics: http://www.kididdles.com/lyrics/i040.html) RHYMES: Here is a weather related rhyme: Red sky at night a sailor’s delight. What other weather rhymes can you find or do you know?
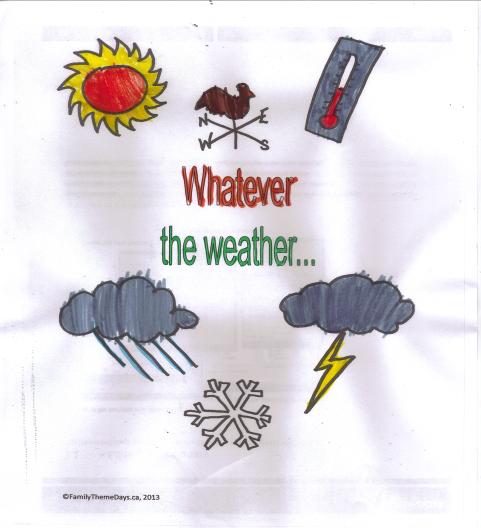
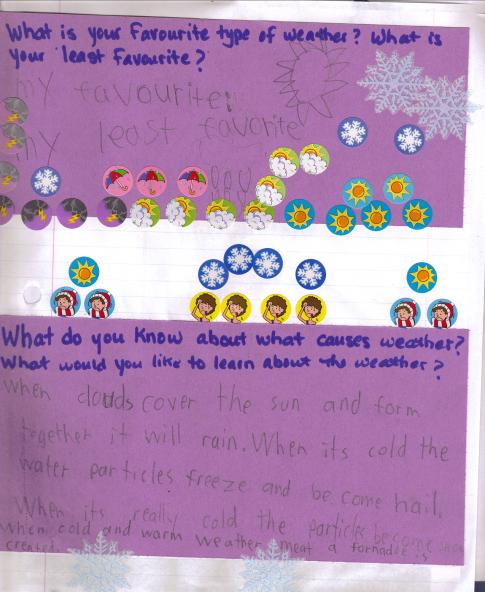
SCRAPBOOK ACTIVITIES: COLOURING PAGES: You can find many free coloring pages online by using your favourite search engine and typing in “weather coloring pages” or print out my “Whatever the Weather” Coloring Page. JOURNALING QUESTION PROMPT: Write out one or more of the following questions in your Family Theme Day Scrapbook or on a piece of paper to glue in your scrapbook: What is your favourite type of weather? What is your least favourite type of weather? What are different types of weather? What do you know about what causes weather? What would you like to learn about the weather? Choose the level of your child: ¨ Toddler – discuss the answer(s) out loud first and have your child draw a picture of the answer ¨ Preschooler/Kindergartener – discuss the answer(s) out loud first and write the answer down for him/her leaving one word for him/her to write out himself/herself with your help. You could also encourage him/her to draw a picture as well. ¨ Early Grade School – have your child either write out the answer himself/herself (encourage phonetic spelling) without your help, or offer to help with spelling each word out loud one word at a time. ¨ Grade School – have your child write a sentence or two on his/her own and then read over and discuss the response. (You decide whether to correct the spelling or not) ¨ Older Child – have your child write a longer response (paragraph). ¨ As A Challenge – instead of a question ask your older child to write a story or a poem about the weather. PUZZLES: Print out a Weather Word Search: Easy Weather Word Search or Difficult Weather Word Search. Check here for the answer keys: Easy Weather Word Search Key or Difficult Weather Word Search Key.
BOOKS: Raid your child’s bookshelves to find any books about different types of weather. OR Go to the library with your child to find some books about weather. OR Go to the library on your own to find books about weather from both fiction and nonfiction to have already on hand for your theme day. Many libraries allow you to go online and search for titles based on subject (Search for “Weather” under “Children’s Books). Reserve them if you can to save time.
Try to find some of these nonfiction/learning titles: · Can it Rain Cats and Dogs, by Melvin and Gilda Berger and illustrated by Robert Sullivan, Scholastic Reference, 1999 – This book answers many weather questions and is full of many interesting facts. · Clouds, by Anne Rockwell and illustrated by Frané Lessac, Collins, 2008—This looks like a picture book but it is a great learning book about the different types of clouds and how you can use the clouds to predict the weather. · Down Comes the Rain, by Franklyn M. Branley and illustrated by James Graham Hale, Harper Collins, 1997—This book is part of the Let’s-Read-and-Find-Out Science Series and is a good review of the water cycle. · Extreme weather, by H. Michael Mogil and Barbara g. Levine, Simon & Schuster Books, 2008—Some kids are fascinated by extreme weather like tornados, Hurricanes, and lightning and this book will appeal to them, other children are sensitive to storms so you may want to pass on this book then. · Eyewitness Books: Weather, written by Brian Cosgrove, DK Publishing, Inc., 2007—These encyclopedia like books contain a lot of information and many photographs making them fun for eager kids to pour over. Older kids will be able to read the small text but smaller children will like the many pictures. · How the Weather Works, by the Templar Company Limited and illustrated by Beverley Young, templar Books, 2011 – I don’t usually recommend pop-up books as they are often hard to find at bookstores and libraries and easily torn by eager hands, but this one is too good to not write about. There is a lot of great information in this hands-on book about rain, clouds, wind, hurricanes and climate. · The Man Who Names the Clouds, by Julie Hannah and Joan Holub and illustrated by Paige Billin-Frye, Albert Whitman & Company, 2006—This book has elements of a picture book in it with the true story of Luke Howard (who created the first practical scientific system for naming clouds), and it also includes projects and learning facts. · Meteorologist’s Tools, by Anders Hanson, ABDO Publishing Company, 2011—this easy to read book has photographs and simple text about meteorologists and their job. · Weather, by Tamara B. Orr, Cherry Lake Publishing, 2010 – This book has 6 experiments (one of which I have a variation written down below) and is a great supplement for your family if you have kids keen on more science experiments. · Weather Mps, by Ian F. Mahaney, Powerkids Press, 2007—This is an interesting book because it is so different from the other weather books we found at the library. This one explains weather maps and what the symbols mean etc..
Here are some picture books about weather: · Cloudy with a Chance of Meatballs and Pickles to Pittsburgh, written and colored by Judi Barret and Drawn by Ron Barrett, Atheneum books for Young Children, 1997— Chewandswallow is a little town where instead of weather, differ foods rain from the sky/ · Hello, Sun! By Dayle Ann Dodds and pictures by Sachiko Yoshikawa, Dial Books for Younger Readers, 2005 – A little girl says hello to the sun and greats dressed only to have the weather continually change for her in this brightly illustrated book. · Let’s Count the Raindrops, illustrations by Fumi Kosaka, Viking, 2001 – This is a collection of ten poems about the weather which come alive thanks to the fun acrylic paintings by this Japanese artist. · The Magic school Bus Kicks up a Storm, by Joanna Cole and Bruce Degen, 2000—Ralphie decides he is a superhero named Weatherman and Ms. Frizzle takes the class ona field trip that helps them to magically explore many different aspects of weather.
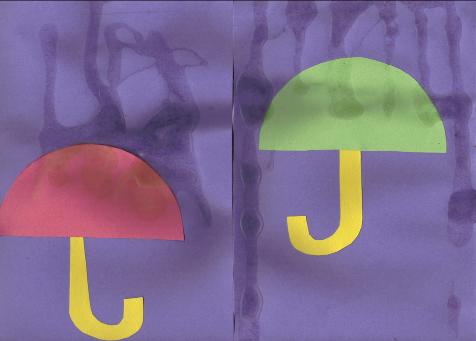
CRAFTS: UMBRELLA AND RAIN PICTURE:
Materials: Blue paper, coloured paper, a bowl for tracing, a pencil, glue stick, child safe scissors, white glue, damp cloth for sticky fingers.
Step 1: Have your child pick the colour of the umbrella and then trace around a bowl with a pencil to create a circle. Cut out the circle and then cut that in half to create the umbrella. Step 2: cut out a letter “J” shape from another colour of paper to be the handle. Step 3: Have your child glue the two pieces together on the blue paper to create an umbrella. Step 4: Use white to drizzle down on top of the umbrella and let it dry to create rain. It would probably look nicer if you drip the glue by squeezing it from the bottle but our top was plugged so we had to unscrew the whole thing and the glue just plopped out in large blobs!
CLOUD AND LIGHTNING PAINTING:
Materials: white paper, grey paint (or mix black and white), blue paper, yellow paper, child safe scissors, glue stick.
Step 1: Have your child paint a cloud on the white paper or draw a simple puffy cloud for you child and have him/her paint on it (good for little ones). Step 2: When the paint dries cut out the cloud and then have your child glue it on the blue paper. Step 3: Next cut out a simple lightning shape from the yellow paper. Step 4: Have your child glue the lightning shape onto the cloud. Step 5: Display or glue into your Family Theme Day scrapbook.
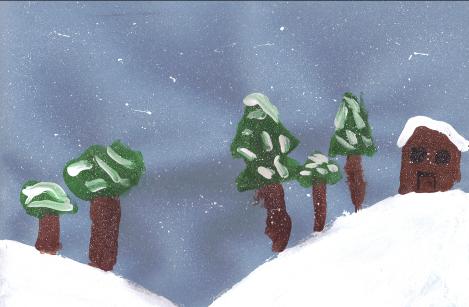
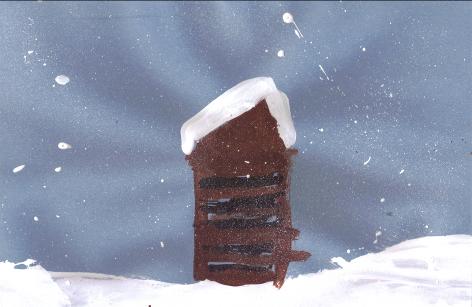
PAINT SPLATTER SNOWY SCENE: Materials: blue paper, white paint, (other colour paint for optional cabins, houses, trees etc.), an tooth brush with stiff bristles that you will keep with your paint supplies, wax paper or paint pallet, old clothes or art smock, newspaper or plastic to cover your work area. Step 1: Have your child paint a wintery scene onto the blue paper using the white paint. Encourage creativity and allow your child to paint trees, houses, a cabin, or animals etc. Step 2: Show your child how to dip the paint brush into the white paint and then hold it pointing down over the painting. Rub the bristles with one finger and let the paint splatter over the blue sky to create a snowing effect. If this isn’t working well your toothbrush may be too soft. Our first round didn't work so I found an old unused stiff toothbrush that I have from a travel kit and that worked much better! Step 3: let the painting dry and then display or glue into your Family Them Day Scrapbook.
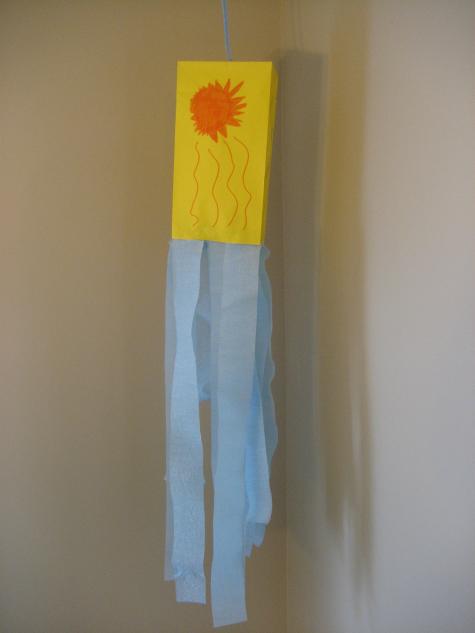
WIND SOCK: NOTE: This wind sock won’t last long in very windy weather and certainly not in the rain. You could make it using a plastic bag if you want it to last longer. We made ours on a snowy day so we simply hung it up inside as a decoration. Materials: Paper bag, streamers, stickers, markers or crayons, white glue, a pin or needle (parent only), a coloured pipe cleaner, tape. Step 1: Have your child decorate the paper bag using crayons, markers or stickers. Step 2: Cut out long pieces of party streamers (we used 10 in total). Step 3: Dab some white glue on the end of each piece of streamer and then have yrou child press them inside the paper bag, hanging down. Step 4: Let the glue dry and then carefully poke a pin through the top of the paper bag (adult step) and insert the pipe cleaner through the hole. Put your hand in the bag to bend a bit of the pipe cleaner down and then tape that end to the inside of the paper bag. Use the pipe cleaner to hang up your wind sock.
PIN WHEEL: Materials: Paper, pencil, ruler, eraser, long pin (we used one from a remembrance day poppy on one which worked the best and another had just a coloured thumb tack which doesn’t spin as nicely), stickers or crayons or markers, child safe scissors, a pencil to use as the pin-wheel stick (It must have an eraser). Step 1: Cut a sheet of white paper so that it is an even square. Step 2: Give the sheet to your child to colour and decorate on both sides. I think crayons give it a nice look. Your child can use stickers, too (we didn’t). Step 3: Lightly draw a line diagonally from each corner to the opposite corner to create an “X” and then lightly draw a circle around the centre point (this is a reference so that your child does not cut past the circle). Step 4: Let your child cut four lines from each corner only until the drawn circle (otherwise the craft will not work). Step 5: (Adult step) Fold up each end until it meets the middle point (the middle of the “X”) and press down as you add each corner. Always go in the same direction and do not press down to bend the paper into a firm fold, you are creating a rounded fold. This is the hardest part as the corners often slipped form my grip! Step 6: (Adult step) Insert the pin through all the folded over corners through the middle of the paper and then press the pin into the eraser of the pencil you are using for the stick. Step 7: Now have your kids blow to try to move the paper pin wheel. Ours was a bit too big and the one that moved the best was the one pictured on the right using a long pin (from the Poppy) not the thumb tack. Have your child see which positions the wind (breath) needs to be to make it move. Generally speaking the pinwheel should spin when the wind hits the center).
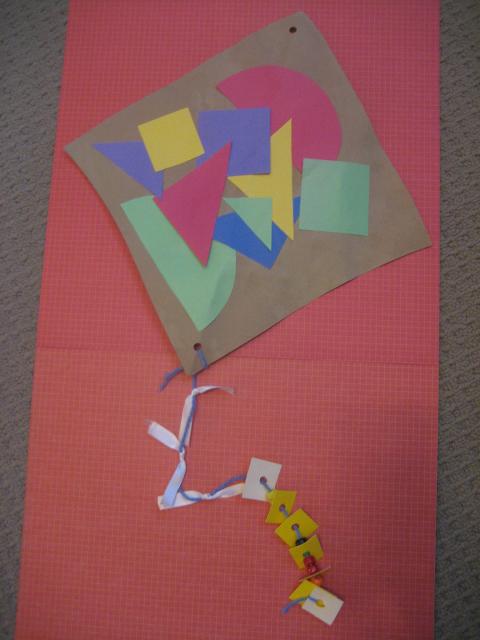
KITE ORNAMENT: Materials: harder construction paper, yarn, hole punch, beads (optional), child safe scissors, crayons, markers or stickers, (Optional) glue stick and scraps of paper cut into different shapes (this is what we used to decorate). Step 1: Cut a diamond shape from the construction paper (as large or as small as you or your child desires). Step 2: Have your child decorate the diamond however he/she chooses. Your child can draw on it using crayons or markers or can decorate it with stickers. We choose to cut out some basic shapes from scrap coloured paper (leftovers from various crafts) and then glued them to the diamond using the glue stick. Step 3: Use the hold punch to punch a hole at the bottom of the kite to thread and tie a piece of coloured yarn to be the kite’s string. Step 5: You can now hole punch another hole at the top to thread a lighter string (some fishing string or simple thread) which is less visible and use this to hand the kite up from the ceiling.
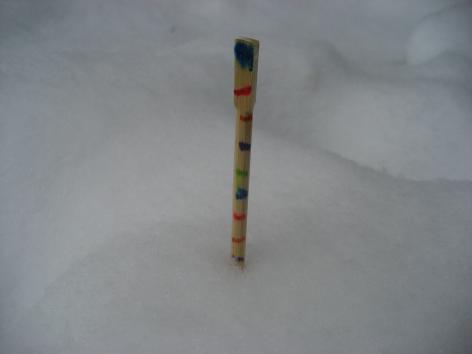
SNOW RULER or RAIN RULER:
Materials: Wooden chopstick (many supermarkets sell sushi and you can get wooden chopsticks from them), markers (we used permanent), a ruler, clear nail polish to paint over
Step 1: Since we live in Canada we measured in centimeters but you could do this in inches if you like. We measured and marked along the chop stick for every centimeter. We choose a pattern of colours before hand (my son had done patterning in school so it was a bit of a math review). Step 2: On the other side we wrote out the numbers (this is not pictured in the photo). The marker leaked a bit and the numbers weren’t very clear but they were useable. Step 3: Then we used clear nail polish to paint one side at a time to make it water proof (we let it dry on wax paper and then proceeded to paint each side this way). I thought it was a brilliant idea at first but saw that the nail polish did make the colours leak a bit! That said, it is a water proof stick so the idea worked functionally at least! Step 4: Stick in the ground at the first sign of snow and then you can measure to see how much you get! NOTE: If you live in an area that does not get snow you can use this as a Rain Gauge by setting the stick up in a large rimmed jar.
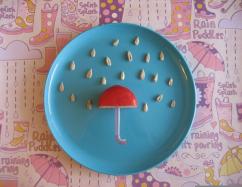
FOOD: BREAKFAST: Snowy Pancakes or French Toast – Dust pancakes or French toast with powdered sugar to create a snowy effect. Check our “More Goodies Photo Album” on our Facebook page (http://www.facebook.com/pages/Family-Theme-Days/194379807256174?sk=photos_albums) for a picture of the snowflake shaped French toast I tried to make (they look more like flowers than snowflakes) dusted with powdered sugar. SNACK: Cheese Umbrellas (I found this idea on Pinterest from Cutefoodsforkids.com, check here for the original link: http://www.cutefoodforkids.com/2011/06/easiest-party-food-babybel-umbreallas.html) Ingredients: Babybell (cheese in wax), bendable straws, sun flower seeds for rain
Step 1: Keep the cheese in the wax and cut it in half. Step 2: Cut a bendable straw just after the bend (be sure you’ve bent it to make a “J” shape already) and stick this into the cheese to be the umbrella handle. Step 3: Serve on a plate with sunflower seeds as rain drops!
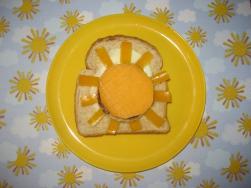
LUNCH: Pop -Up Sunny Egg: When I was little my mom called these Pop-eyes (I think they are really called Egg-in-a-hole). For this Theme Day I’ve given them a new name and a new twist. Ingredients: slice of bread, a small circle cookie cutter or a small cup (that’s what I used), an egg, shredded cheese, a slice of orange cheddar (large enough to be cut by the same cookie cutter or cup), slices of yellow or orange bell pepper.
Step 1: Heat a frying pan on medium (spray with cooking pray or use butter or margarine to prevent sticking). Step 2: Use the cookie cutter or cup (I use a thin plastic cup) to cut out a circle from the centre of the bread. Step 3: Butter one side of the cut out bread and the circle bread and when the pan is hot enough set the bread onto the pan butter side down. Step 4: Crack an egg and gently pour it into the centre of the cut bread. Put a lid on the pan or use a cookie sheet if you have no lid (that’s what I have to do). Step 5: Keep checking the egg for readiness and lower heat if the bread is getting too toasty. Flip over the small circle of bread to fry the other side (you can butter that side before flipping if you desire). Step 6: Use the same cookie cutter/cup to cut out a circle of orange cheese. Step 7: When the egg is cooked to your child’s liking, take it out of the pan and plate it. Set the circle of bread on top of the egg and then set the circle of cheese on top of that. Tuck in pieces of orange and yellow pepper to be the sun’s rays. Step 8: Enjoy!
DINNER: Twister Pasta: Serve some twisty rotini or fusilli for dinner with your child’s favourite sauce and point out how the shapes are like mini tornados!
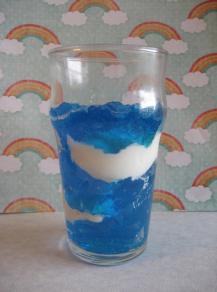
DESSERT: Cloudy Sky Jell-O: I found this idea Pinterest (check here for the link I used: http://www.hawaiikawaii.net/2011/cloudy-sky-jello-tutorial/). You simply make some homemade whipped cream (beat half a 500 mL container of whipping cream with 1/8 cup of granulated sugar) and keep it chilled in the fridge as you make the blue Jell-O. Add 1 cup of boiling water to a bowl with the powdered blue Jell-o in it and then mix until dissolved. Then add an overflowing 1 cup of ice to the Jell-O and stir. If the ice melts and the Jell-O is still not thick enough you can put it in the fridge for about 15 minutes. Once it is firmer but still moveable you can then layer whipped cream and blue Jell-o in a tall glasses, parfait cups, or even a jars. You can then set it more in the fridge or eat as is!
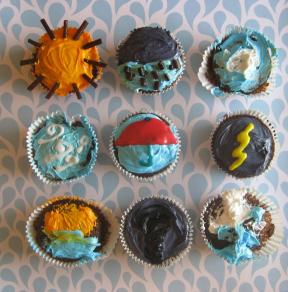
Weather Cupcakes: My boys had a lot of fun with this one. We made some Chocolate Chip cupcakes (used Marian Keyes's recipe from her cookbook Saved by Cake) and then I cheated a bit and we used store bought icing (I usually make my own as I LOVE homemade butter cream but I knew the cupcake recipe only made twelve cupcakes and my butter cream recipe makes WAY more icing than I ever need!) and I separated the icing into different bowls and then coloured it with both liquid food colouring and gel food colouring (I have quite the collection from Birthday Parties and Theme Days!). Then we had fun coming up with different weather related ways to decorate the cupcakes! We used dried fruit bars for the sun’s beams and also used Scribbler’s icing tubes for details like the umbrella and the lightning bolt.
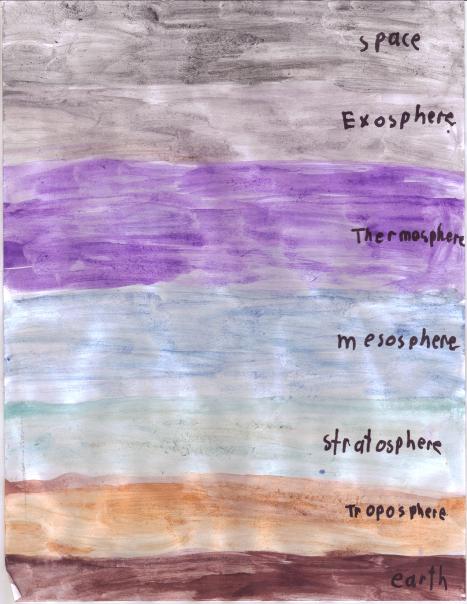
LEARNING ACTIVITIES: ATMOSPHERE ART: Create a beautiful striped illustration of the atmosphere using water colours. Have your child paint a small strip of brown for the earth, then a slightly larger stripe for the troposphere, then the same sized strip for the stratosphere. Next have your child paint the mesosphere using a darker blue and slightly larger stripe. Then have your child use purple to create the thermosphere stripe the same size as the dark blue one or slightly larger. Lastly, have your child paint the exosphere in grey and if there is still room on the paper he/she can paint a black strip for space. When the colours dry you can have your child write the names of the different layers of the atmosphere onto each stripe. NOTE: You can also add pictures or clip art to the layers to show some info about each. For instance the troposphere can have a kite, the stratosphere an airplane, the mesosphere a meteor since this is where meteors burn out, and the thermosphere can have a satellite and some aurora borealis or australis. To see how our atmosphere Picture looked after we added clip art check out our More Crafts and Activities Facebook Album here: http://www.facebook.com/pages/Family-Theme-Days/194379807256174?sk=photos_albums PRINTABLES:
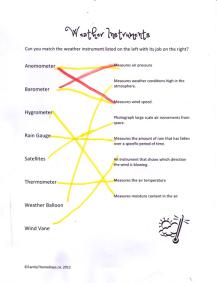
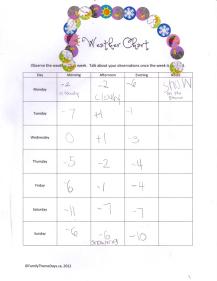
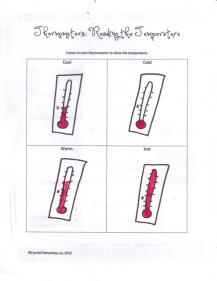
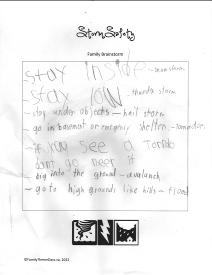
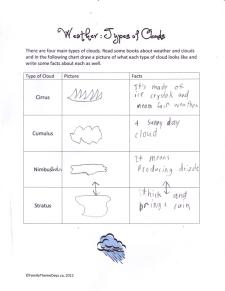
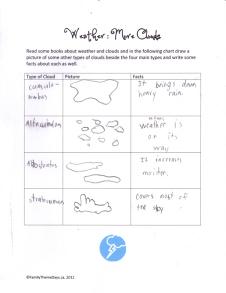
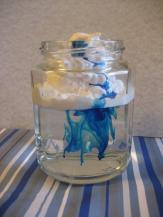
MATCHING: Print out a copy of my Weather Instruments Matching Worksheet and together as a family see if you can match the instrument with its correct. To see if you have the correct answers check here for the Matching Weather Instruments Key. WEATHER CHART: Print out a copy of my Weather Chart and have your child fill it in for a week. Have smaller children draw pictures of the weather using simple weather symbols (sun, cloud, raincloud, lightning cloud, snowy cloud, wind blowing) or give your child stickers to stick to each spot. NOTE: This would also be an interesting seasonal activity as you could have your child fill the weather chart out at the start of each season or even once a month. Talk about what your child observed on the chart. TEMPERATURE: Print out my Thermometers: Reading Temperature Worksheet and have your child colour in what he/she thinks the thermometer would look like for cool, cold, warm and hot temperature. I have only put zero on this worksheet and no numbers to that you can do that yourself to make it suitable for either Celsius or Fahrenheit temperature readings. BRAINSTORM: Print out my Family Brainstorm Worksheet for Storm Safety and together as a family write down ways to keep safe in a storm or ways to prepare before a storm. Simple things like don’t go swimming in a storm, or dress properly for snow would work for this chart but this activity would be especially helpful if you live in an area that often has extreme storms like blizzards, tornados, floods etc. as you can come up with an emergency plan together. You can use this to help create an emergency preparedness kit, to write down a list of emergency phone numbers, to go over where to go in case of an emergency storm etc. TYPES OF CLOUDS: For this activity you will need a book about clouds (see books above) from the library or if you cannot find a book here is a website with information about clouds for kids: http://eo.ucar.edu/webweather/cloud3.html There are four main types of clouds: Cirrus, Cumulus, Nimbus and Stratus. Print out my Types of Clouds Worksheet and together as a family read about clouds from a nonfiction book about weather. Fill in the chart by drawing a picture of what each of the four main types of clouds look like and then by writing down facts about each type of cloud. If your child is really interested in the types of clouds print out this supplementary worksheet and have him/her write about and draw some different types of clouds (not the four main types) like Cumulonimbus and Cirrocumulus clouds. SIMULATION: RAIN IN A JAR 1: Fill a jar or a cup with water. Put shaving cream on top to represent the cloud. Explain that when clouds get really heavy with water, it rains! Then put drops of blue food colouring on top of the cloud (shaving cream), and watch it rain as the blue colouring streaks downward. EXPERIMENTS: RAIN IN A JAR 2: Materials: An empty jar, hot steamy water (adult help), plastic wrap, an elastic band, ice cubes.
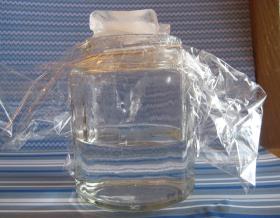
Step 1: (Parent step) Pour the hot steamy water into the jar until it is about 1/3 filled. Step 2: (Parent step) Carefully place plastic wrap on top of the jar to seal it and wrap the elastic band around the rim to keep the plastic wrap in place. Step 3: Wait a minute and then place some ice cubes on top of the plastic wrap. Step 4: Observe the inside of the jar to see what happens! NOTE: You should notice streaks of water running down the side of the jar and dripping from the plastic wrap. NOTE: Why does this happen? The jar is full of warm air which represents the moist warm air in the atmosphere. The ice represents the colder air high in the atmosphere. This cold air causes the water vapor (steam) in the jar (air) to condense which forms precipitation that falls to the ground.
CLOUD IN A BOTTLE: Materials: a large 2 L empty plastic pop bottle (including the lid), matches (for adult use only), warm water
Step 1: Fill the plastic pop bottle 1/3 of the way full of warm water and screw the lid back on. At this point you should notice water vapor in the bottle (if not, then your water is not hot enough and you will need to try again). Step2: Next have your child squeeze the pop bottle and observe. There is nothing to observe at this point. Step 3: Next unscrew the lid but don't remove it yet (have your child do that when you are ready). Light a match (adult step) and then open the bottle and drop the lit match into the bottle and then quickly screw the lid back on! Step 4: Have your child squeeze the bottle again. This time you should notice that when you release the squeeze a cloud will appear in the bottle and when you squeeze it disappears only to reappear again when you release. NOTE: Why does this happen? The first thing needed to make a cloud is water vapour and the warm water in the bottle provides this. Squeezing the bottle represents the warming that occurs in the atmosphere. When the squeeze is released that represents the cooling that happens in the atmosphere which is representative of a drop in air pressure. The smoke from the match provides the dust or other particles in the air that help form a cloud. MORE WEATHER RELATED EXPERIMENTS: There are so many different weather related experiments. You can even make your own barometer. For many more experiments try here: http://www.weatherwizkids.com/experiments-cloud.htm Also check out this book for young scholars: Weather Detectives: Fun-Filled Facts, Experiments, and Activities for Kids!, by Mark Eubank and illustrated by Mark A. Hicks, Gibbs Smith Publisher, 2004. STORMY DAY/NIGHT ACTIVITY: COUNT THE STORM: The next time you encounter a storm try this technique to gauge how far away it is. 1. After you see a flash of lightning, count the number of seconds until you hear the thunder (you can use a stop watch or count “One-Mississippi, Two-Mississippi, Three-Mississippi…). For every five seconds the storm is about one mile away. Divide the number of seconds you count by 5 and you will get the number of miles away the storm is. This always helps my nervous son as he likes to tell when the storm is approaching but more importantly when it is going away! WEBSITES: This is a great site for kids with games, clips and info: http://www.theweatherchannelkids.com/ This site has a lot to offer - information, experiments, optical illusions, folklore, photos and kid’s questions etc. – and is worth checking out: http://www.weatherwizkids.com For information about the different types of clouds try this site: http://eo.ucar.edu/webweather/cloud3.html FOR FUN: JOKES: Q: What falls down but never gets hurt? A: Snow or rain.
Q: What did one lightning bolt say to another? A: You’re shocking!
Q: What is it called when it rains ducks and chickens? A: Fowl weather
Q: How do hurricanes see? A: With one eye.
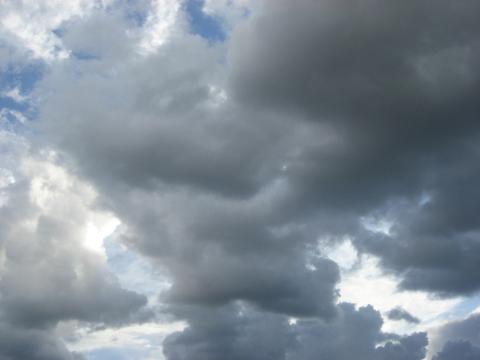
EXTENDED ACTIVITIES: AUDIO VISUAL: Search through your child’s DVD/ video collection (or visit your local library before hand or the Video Store) to find your child’s favourite shows about weather. For young children try these titles: · Sid the Science Kid: Weather Kid Sid, The Jim Henson company, 2009 – Sid learns about rain, the sun, wind and cold weather in these four episodes. Movies: · Cloudy with a Chance of Meatballs Try to find these learning titles at your local library: · Bill Nye the science Guy: Climates, Disney Educational Productions, 2003 · Rock ‘N Learn: Earth Science, Rock ‘N Learn, Inc., 2008 OUTDOOR ACTIVITIES: Cloud Gazing: Lie down on your back and faze at the clouds. What shapes do they make? What fun things can you see in the clouds? Can you name the types of clouds in the sky? Can you name the types of clouds? Can you predict the weather by looking at the clouds? FIELD TRIP: Some museums have displays about weather. Check what your local museum has to offer and visit it if there is something about weather on showcase.
|

|
Photo: C Wright |
|
Slippery when wet! |
|
Weather Coloring Page |

|
Journaling about the Weather |


|
Rain and Umbrella Glue Crafts |

|
Lightning and Cloud Craft |

|
Paint Splatter Snow Scenes |

|
Simple Paper Wind Sock |

|
Paper Pin Wheel |

|
Kite Ornament
|

|
Weather Inspired Foods |

|
|
|
Snow Fall Ruler |

|
Atmosphere Watercolour Picture |

|
Learning about Weather Printables |

|
Learning about Clouds Printables |


|
|
|
Rain in a Jar Experiments |

|
|
|
|
|
What’s the weather like today? |