|
Trees/Arbor Day Many countries celebrate Arbor Day but the date varies, although it usually takes place in the spring when the weather is perfect for planting trees. This Theme Day is great to do around Arbor Day but it can be done any time you plan on visiting a forest for a hike or a picnic as it just celebrates trees! Print out the Family Theme Day Planner and decide which activities you’d like to do and in what order.
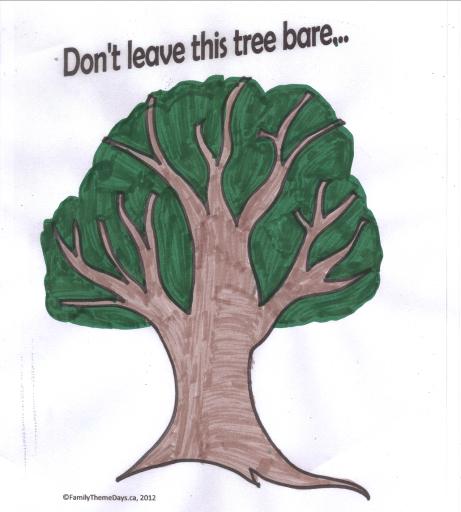
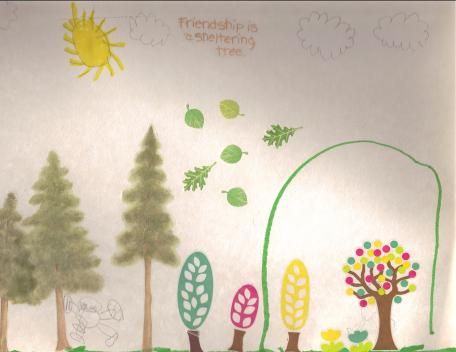
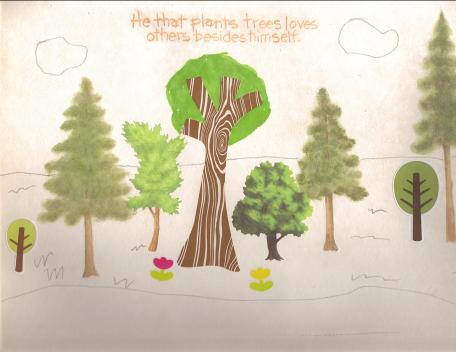
INTRODUCTORY DISCUSSION: Arbor Day originated in Nebraska in 1872. It is a day that encourages people to plant and care for trees. Check here to see when it is celebrated where you live: http://en.wikipedia.org/wiki/Arbor_Day SONGS: For a children’s song try “The Green Grass Grows All Around.” Check here for lyrics: http://www.kididdles.com/lyrics/g012.html For another tree song try “If a Tree,” by Bruce Cockburn. RHYMES: Here is a famous poem about trees (perhaps you could get your child to illustrate the poem): I think that I shall never see Alfred Joyce Killmer SCRAPBOOK ACTIVITIES: COLOURING PAGES: You can find many free colouring pages online by using your favourite search engine and typing in “Trees coloring pages” or print out my Don’t Leave This Tree Bare Coloring Page.
JOURNALING QUESTION PROMPT: Write out one or more of the following questions in your Family Theme Day Scrapbook or on a piece of paper to glue in your scrapbook: Why are trees important? What types of trees can you think of? What is your favourite type of tree? What do you know about Arbor Day?
Choose the level of your child: ¨ Toddler – discuss the answer(s) out loud first and have your child draw a picture of the answer ¨ Preschooler/Kindergartener – discuss the answer(s) out loud first and write the answer down for him/her leaving one word for him/her to write out himself/herself with your help. You could also encourage him/her to draw a picture as well. ¨ Early Grade School – have your child either write out the answer himself/herself (encourage phonetic spelling) without your help, or offer to help with spelling each word out loud one word at a time. ¨ Grade School – have your child write a sentence or two on his/her own and then read over and discuss the response. (You decide whether to correct the spelling or not) ¨ Older Child – have your child write a longer response (paragraph). ¨ As A Challenge – instead of a question ask your older child to write a story or a poem about trees or Arbor Day. PUZZLES:
Print out a Trees Word Search: Easy Trees Word Search or Moderate Types of Trees Word Search or Difficult Arbor Day Word Search.
Check here for the answer keys: Easy Trees Word Search Key or Moderate Types of Trees Word Search or Difficult Arbor Day Word Search Key.
BOOKS:
Raid your child’s bookshelves to find any books about trees. OR Go to the library with your child to find some books on about trees. OR Go to the library on your own to find books about trees from both fiction and nonfiction to have already on hand for your theme day. Many libraries allow you to go online and search for titles based on subject. Reserve them if you can to save time.
Read some of these nonfiction/learning titles about trees if you can find them:
· A Tree is a Plant, by Clyde Robert Bulla and illustrated by Stacey Schuett, HarperCollins Publishers, 2001—This is a great review of the growth of a tree looking at an apple tree for younger children.
· Be a Friend to Trees, by Patricia Lauber and illustrated by Holly Keller, Harper Collins Publishers, 1994 – Part of the Let’s-Read-And-Find-Out-Science Series, this book is a good introduction to the importance of trees in our world.
· Celebritrees: Historic and Famous Trees of the World, by Margi Preus and illustrated by Rebecca Gibbon, Henry Holt and Company, 2010—This is a unique non-fiction book since it looks at famous trees making it a fun and different read for this Theme Day.
· The Life Cycle of a Tree, by Bobby Kalman & Kathryn Smithyman, Crabtree Publishing, 2002—This is a thorough exploration of the life cycle of a tree.
· Redwoods, by Jason Chin, A Neal Porter Book, 2009—I loved how the illustrations in this book tell the story of a boy who finds the book and how he can imagine he is in a redwood forest simply by reading it but the text is non-fiction teaching all about the mighty redwood trees.
· Tell Me , Tree: All About Trees for Kids, by Gail Gibbons, Scholastic Inc., 2002 – This is a thorough little book with lots of illustrations to teach young scholars about trees.
· Trees, by Christine Petersen, Cherry Lake Publishing, 2009 – This is a simple book that explains just enough for young arboriculturists to learn about trees and offers photographs.
· Trees, Text by Maria Angeles Julivert, Enchanted Lion Books, 2006—This is a thorough non-fiction book for older kids with just enough info and illustrations but not too much to make it unapproachable.
· Wangari’s Trees of Peace: A True Story from Africa, by Jeanette Winter, Harcourt, Inc., 2008—This is a picture book but it is about a true woman, Wangari Maathai who started the Green Belt Movement in Kenya in 1977 and won the Nobel Peace Prize in 2004. It is a wonderful tale to share with your children about bravery and about the importance of trees.
· Who Will Plant a Tree?, written by Jerry Pallotta and illustrated by Tom Leonard, Sleeping Bear Press, 2010—This is a picture book but it teaches how different animals actually help to plant trees so I am putting it under non-fiction.
Here are some picture books about trees:
· Arbor Day Square, by Kathryn O. Galbraith and illustrated by Cyd Moore, Peachtree, Publishers, 2010—A little Prairie town plants trees every year.
· A Tree is Just a Tree?, by Brenda Silsbe and illustrated by Yayo, Lobster Press, 2001 – This sweet little book offers a rhyme that questions how we look at trees.
· The Inside Tree, by Linda Smith and pictures by David Parkins, harper Collins Publishing, 2010—This is a humorous story of Mr. Potter who thinks his tree looks lonely all by itself outside.
· Leo’s Tree, by Debora Pearson and art by Nora Hilb, Annick Press, 2004—This simple book with easy to read text shows Leo as a baby and his father planting him a tree.
· Our Apple Tree, by Görel Kristina Näsland and illustrated by Kristina Digman, Roaring Brook press, 2002—Two children share all the joys of their apple tree. · We Planted a Tree, by Diane Muldrow and illustrated by Bob Staake, A Golden Book, 2010 – With bright illustrations this book celebrates trees and shows how all over the world they help in different ways.
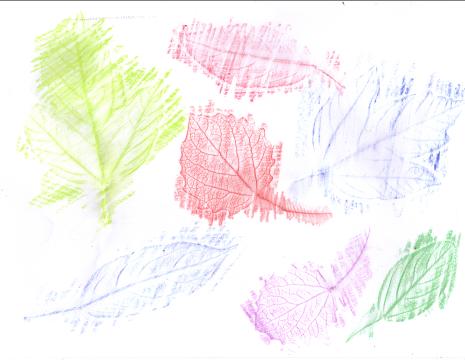
CRAFTS: LEAF RUBBINGS OR LEAF PAINT PRINTS: NOTE: You can go for a Family Walk or Hike before doing this craft to collect leaves from the ground. Encourage your kids to find the leaves from the ground and not to break them from live trees as this will damage them. If you need to remove leaves from a living tree (adult step only) because you cannot find any leaves on the ground be sure to pinch gently to remove a leaf so that the branch is not damaged. Materials: Various leaves, crayons (best if the paper wrapping is peeled off), white paper.
Step 1: Take a leaf and set it under a piece of paper. Have your child choose the colour of crayon to use. Step 2: Rub the side of the crayon over the spot where the leaf rests to leave an impression or leaf rubbing on the paper. Step 3: Glue into your Family Theme Day Scrapbook once dry.
VARIATION: You can also do a variation of this if you are having this Theme Day in a season where there are not many leaves around by making bark rubbings. Just lean the paper against a tree and rub with a crayon.
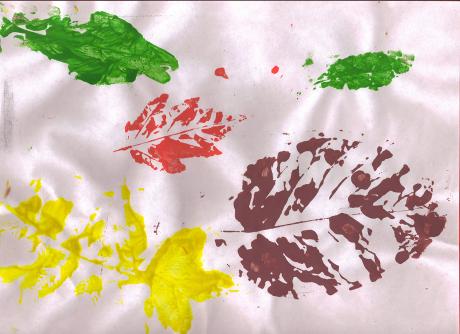
VARIATION: Instead of leaf rubbings you can have your child paint each leaf and then press it to the white paper to leave an imprint of the leaf.
FOUR SEASONS TISSUE PAPER TREE: NOTE: This Theme Day is a good time to review the seasons with your little ones. Studying trees is the easiest way to see the various changes that nature goes through each season. This craft is a great reminder of that.
Materials: Colored paper (we used yellow), brown paper, child safe scissors, white glue, waxed paper, pencil, ruler, white tissue paper, pink tissue paper, green tissue paper, orange or yellow tissue paper.
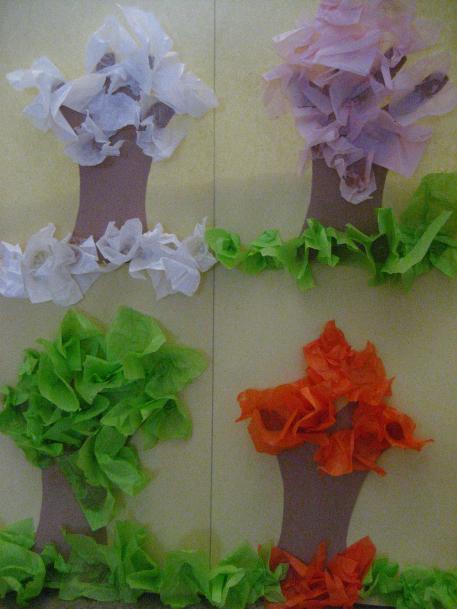
Step 1: Fold the paper in half and then fold again to divide the paper into four sections. Use a ruler and pencil to mark off these sections. Step 2: Fold the brown piece of paper over three times and then cut out a simple tree shape. By folding the paper each and cutting through the layers you will get four trees that are the same. Step 3: Have your child glue the four trees onto the divided paper : one in each section. Step 4: Cut out small squares of tissue paper from each of the four colours. Step 5: Put some white glue on a piece of waxed paper. Step 6: Show your child how to fit a square of tissue paper around the eraser tip of a pencil. Pinch the tissue paper tightly to keep it against the pencil and then dip into the white glue. Step 7: Press the pencil with the tissue and glue onto one of the trees glued to the paper. Ask your child in advance which colours would represent which season. White is for the snow of winter covering the tree. Pink is for the blossoming blooms on spring trees. Green is for the full summer tree. Orange is for the autumn tree. Step 8: Display!
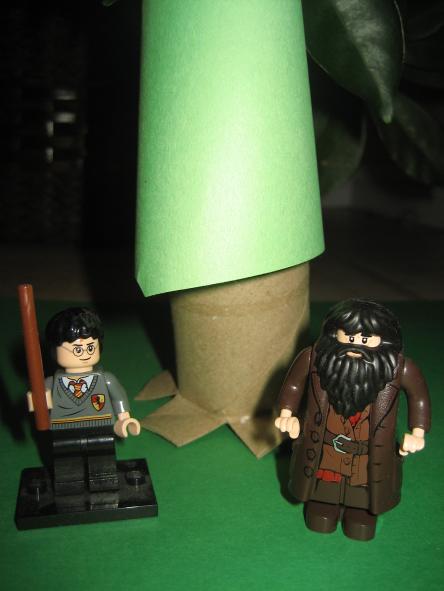
PAPER TOWEL ROLL TREES: Materials: Empty paper towel rolls or toilet paper rolls, child safe scissors, green paper, construction or cardboard paper, clear tape, glue stick. NOTE: Give your child free reign to be creative and come up with different types of trees for this activity. Let them create branches and leaves in different ways. I offer only a few suggestions. Step 1: To make a larger tree use the paper towel roll. To make a fir tree use the toilet paper roll. Cut some slits on the bottom of the paper roll (not too big—3 cm or 1 inch is best). Bend the slits to look like roots and tape them to the construction paper or cardboard. Step 2: For a larger tree cut more slits at the top of the tree and bend and fold and squish them in different directions to make branches. Step 3: For a larger tree you could leave it bare as in the above step or cut out more branches from brown paper and leaves from green paper (or use more autumn colours if desired) and glue or tape to the paper roll. Step 4: To make a fir tree cut a half circle out of green paper and then bend it into a cone shape. Set the cone on top of the toilet paper roll. Step 5: Depending on the size of your construction paper or cardboard your child could create a whole forest. Great for playing with action figures or LEGO figures or plastic animal toys.
POTATO STAMP FOREST PICTURE:
NOTE: You can discuss the importance of nature reserves, forests, and areas with many trees before doing this craft. The Family Brainstorm Activity below can help with this.
Materials: One or two potatoes cut in half, white paper, green paint (various hues) or other leave inspired colours for autumn trees, brown paint, wax paper, paint brushes, newspaper or plastic to cover the work area, old clothes or art smock, paper towels, jar of water.
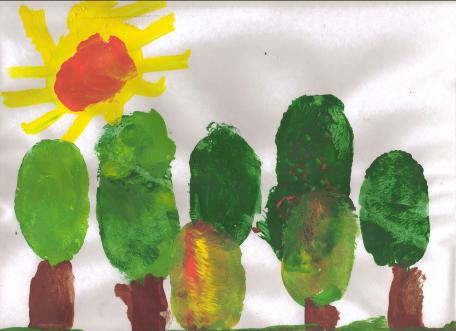
Step 1: Have your child paint the cut side of a potato. Show your child how to press it onto the white paper (leaving it pressed for the count of 5 or more) and then gently lifting it upwards so as not to smudge. Once removed the oval stamp shape will be the leafy top of a tree. Step 2: Encourage your child to use the colours he/she wants and to stamp them however he/she wants on the page to create a forest. Step 3: Encourage your child to add embellishments like tree truck with brown paint, grass or dirt for the ground, even a sky and birds. Step 4: Let the painting dry and then display or glue into your Family Theme Day Scrapbook.
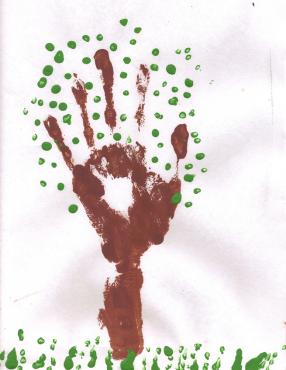
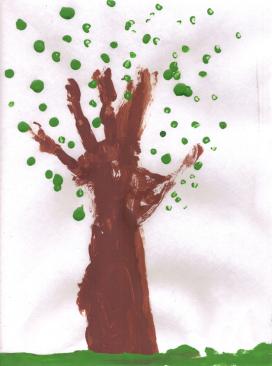
TREE HANDS: If you are doing the above craft leave your paint supplies out and try this craft as well. Materials: White paper, green paint (various hues) or other leave inspired colours for autumn trees, brown paint, wax paper, paint brush, old pencil with an eraser you don’t mind wrecking, newspaper or plastic to cover the work area, old clothes or art smock, paper towels, jar of water.
Step 1: Help your child paint his/her palm and arm brown and then guide him/her to press the painted arm/hand onto the white paper. Gently press and keep pressed for a count of 5 or more and then slowly lift the arm up. Step 2: The arm and hand should make a basic tree shape. My eldest liked his the way it was but my youngest wanted to add more paint to make the trunk thicker. Let your kids decide. Step 3: Show your child how to dip the pencil eraser into the green paint (on the waxed paper) and then press it to the paper to create dot leaves. Let your child “decorate” the tree with leaves and even make grass if desired. Step 4: Let the picture dry and then display or glue into your Family Theme Day Scrapbook.
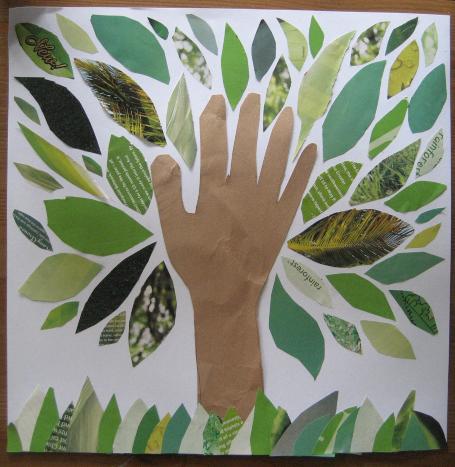
TREE PICTURE WITH MAGAZINE LEAVES: This was my favourite craft of this Theme Day and I really want to frame it for our house! Materials: Brown paper, white paper (large—we used a scrapbook sized page), old magazines to cut up, child safe scissors, glue stick, pencil.
Step 1: Trace your child’s hand and arm onto the brown paper to make a tree trunk. Cut it out and glue it to the white paper. Step 2: Go through old magazines and searach for pages with green on them (even green with words on them). Rip out the pages and together cut these green pages to make leaves for the tree. This is harder for little ones to do but encourage them to look for more green in the magazines while you cut out the leaf shapes. Step 3: Glue the leaves around the hand tree trunk. Step 4: (Optional) We had a lot of left over leaves and decided to cut them in half and use them as grass for the bottom of the picture.
TWIG TREE:
NOTE: You can go for a Family Walk or Hike before doing this craft to collect twigs from the ground. Encourage your kids to find the twigs from the forest floor and not to break them from live trees as this will damage them.
Materials: Various thin twigs, cardboard, white glue, (Optional) paints to decorate or dried beans or lentils or leaves to glue on.
Step 1: Encourage creativity with this one and let your child create his/her own tree picture using the twigs and white glue. Step 2: This craft will take a long time to dry but once it does your child could decorate it more by using paint to add leaves, or by gluing dried beans or lentils as leaves, or by gluing actual leaves. Step 3: Let the decorations dry and then display!
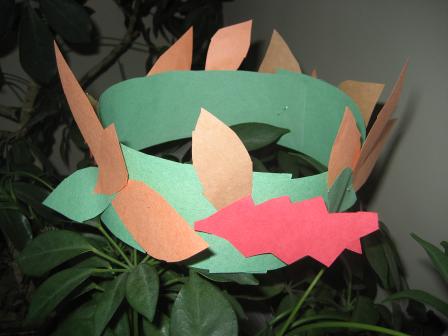
PAPER LEAF CROWN:
Turn your child into a wood nymph by making this simple leaf crown.
Materials: Green paper (or green and brown paper, or use more fall colours for an autumn crown), child safe scissors, stapler or tape or glue.
Step 1: Cut a long strip of paper (either green or brown) to be the headband and measure it around your child’s head. Pinch together the ends once it fits and staple or tape into place. Step 2: Cut out various shapes and types of leaves from the paper (for a template use my Leaves of Autumn Colouring page from our Autumn Theme Day—likewise your child could just colour that colouring page and then cut out the leaves for this craft) and then glue, tape or staple them to the headband/crown.
TREE STICKER PICTURE: Materials: Various stickers of trees, paper, pencil, (Optional) markers or crayons or pencil crayons.
Step 1: Give your child the stickers or trees and let him/her create a forest scene or a collage. Step 2: Encourage your child to add embellishments with pencil, markers, crayons or pencil crayons if he/she desires.
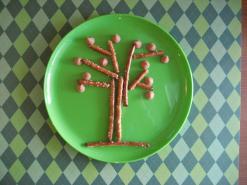
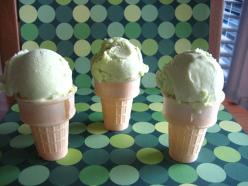
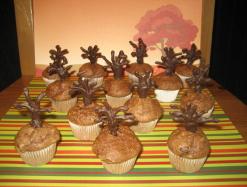
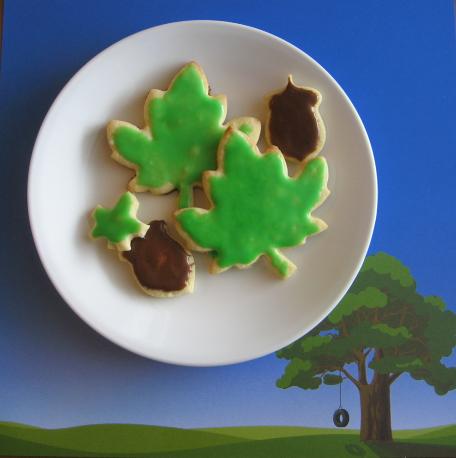
FOOD: SNACK: Pretzel Tree: Have your children arrange pretzels on a plate like a tree. We decorate ours with butterscotch chips as well to be autumn leaves. LUNCH: Salad Trees: We cut pieces from a tube or refrigerated pizza dough (Pillsbury) and arranged them on the baking tray in different ways to let them cook into trunk and branch shapes. I sprinkled the dough with Italian seasoning and Parmesan cheese and garlic powder for extra flavour and a bark like look. Once they are cooked get your kids to decorate them like trees using spinach leaves, cheese strings, dried cranberries (or fresh berries whichever your child would prefer) etc. DINNER: Shell Pasta with pesto sauce kind of looks like leaves! DESSERT: Tree cones: Using flat bottom ice cream cones, mint ice cream or lime sherbet, made an edible and tasty tree. Chocolate cupcakes with chocolate trees – melt chocolate chips or two blocs of semi-sweet chocolate in the microwave (in 30 second intervals, pressing the chocolate each time to test whether it is fully melted) and put the melted chocolate in a ziplock bag, cut a small slit on one corner of the plastic bag and squeeze into tree shapes on wax paper, let the chocolate harden in the fridge and then carefully peel off and stick in the chocolate cupcakes or muffins. We made orange chocolate mini muffins! Cookie Leaves—make your favourite sugar or butter cookies (we used Nigella Lawson’s: http://www.foodnetwork.com/recipes/nigella-lawson/cut-out-cookies-recipe/index.html) and then use leaf cookie cutters or cut free hand to create leaves. When they are cooked and cooled get your kids to paint them using icing tinted green. We made acorns too and used chocolate icing for those!
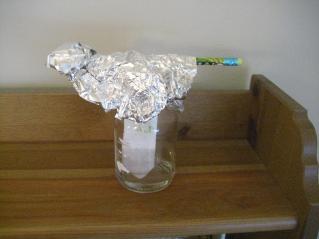
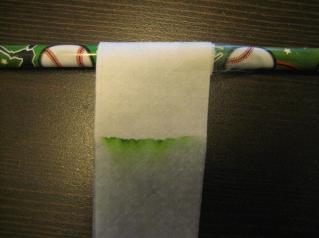
LEARNING ACTIVITIES: PARTS OF THE TREE: Using any of the above tree crafts (pictures) have your child label the 5 main parts of the tree: roots, Trunk, Branches, twigs and leaves. NOTE: You could also make an additional craft by simply cutting out different shapes from coloured paper to assemble a tree (large brown rectangle for the trunk, brown skinny triangles for the roots, small brown rectangles for the branches and twigs, and small green ovals for the leaves). Encourage your child to write the parts on the craft him/herself. CHART: Print out a copy of my “Classify Trees” Printable Worksheet and together as a family read non-fiction books about trees. While you are reading the books write down the names of any deciduous, evergreen or coniferous trees you encounter. CHLOROPHYLL EXPERIMENT: Note: Leaves have a green pigment in them which is called chlorophyll. This is a chemical that causes photosynthesis (which is the process plants use to capture sunlight and is how trees and plants “eat” and grow). Leaves also have different pigments in them to help capture the colors of light that chlorophyll misses. It is also these other pigments that come through in autumn when the leaves change color as the hours of sunlight lessen and the plants rely on the reserved chlorophyll. Materials: A copy of my Chlorophyll Experiment Worksheet. Coffee filter, child safe scissors, glass or jar, a leaf (or more if you want to test more than one type of leaf), a coin or butter knife, rubbing alcohol, a pencil or straw, tape, tin foil. Step 1: Cut a wide strip from the coffee filter making a point at one end with the scissors. Step 2: Place a leaf on top of the filter strip about a quarter of the way up above the cut point. Gently roll the edge of the coin over the leaf to press it enough to release some green “juice”. You could also use a butter knife for this. Step 3: Let the paper dry. If you want you can repeat step 1 to 3 and use different types of leaves. Step 4: Tape the dried paper strip to the middle of a pencil or straw making sure it will reach down into the jar but not touch the bottom of the jar. Step 5: Pour some rubbing alcohol into the bottom of the jar or glass. You want enough so that the tip of the coffee filter touches the rubbing alcohols. Make sure that the “juice” markings do not touch the alcohol (you may have to adjust the strip). Step 6: To keep the alcohol from evaporating be sure to lay a piece of tin foil over the top of the jar or glass. Step 7: Observe and have your child(ren) write down what you see. Step 8: Wait 10 minutes and observe again and write more observations on your worksheet. Do not allow the alcohol to “climb” to the top of the filter paper strip. NOTE: You should be observing the alcohol moving up the coffee filter drip and then carrying the colour pigments left in the leaf “juice”. Within 10 to 20 minutes the different coloured pigments should be separated. NOTE: This strip of paper is actually called a chromatograph.
FAMILY BRAINSTORM: Print out a copy of my “Why are trees important to the world?” printable and discuss the various things that trees provide to the world, like oxygen, food (in the form of various fruits and nuts), and homes for different animals. WEBSITE: Here is a website for kids (with various grade levels) about tree farms: http://www.realtrees4kids.org/ You don’t have to be from Canada to learn about trees from this educational site: http://www.treecanada.ca/site/?page=home_kids&lang=en This site has lots of information about Arbor Day but this link in particular is also a great site for the family about nature: http://www.arborday.org/explore/
FOR FUN: JOKES: Q: What did the tree say to the woodcutters?
Q: What type of drink do trees like to drink? A: Root beer.
Q: What did the tree wear to the pool party? A: Swimming trunks.
Q: How do trees get onto their favourite website? A: They log in.
EXTENDED ACTIVITIES: AUDIO VISUAL: Search through your child’s DVD/ video collection (or visit your local library before hand or the Video Store) to find your child’s favourite shows about trees. We highly recommend this movie: · The Lorax – an excellent movie about the importance of trees, based on an excellent Dr. Suess book.
For a movie about saving the trees try this: · Fern Gully
For young children try these titles: · Shalom Sesame: Grover Plants a Tree · Go Green – a collection of Nickelodeon shows with The Wonder Pets! Save the Tree on it.
Try to find this non-fiction title at your local library: · Bill Nye the Science Guy: Forests, Disney Educational Productions, 2005
OUTDOOR ACTIVITIES: · Find out if there are any Arbor Day activities going on in your community and join in. · Plant a tree in your yard. · Picnic under a tree in your yard · If you are doing this Theme Day in the Autumn rack leaves together.
FIELD TRIP: · Go for a walk or a hike in the woods or in a park with trees. · Picnic under a tree in the woods at a national or state/provincial park or just at a local park.
|

|
Have you hugged a tree today? |
|
Photo: C Wright |
|
A Tree Coloring Page |
|
Leaf Rubbing with Crayons and Leaf Prints with Paint |
|
The Four Seasons Tree Craft |
|
Potato Stamp Tree Forests |
|
Paper Leaf Crown |
|
Tree Sticker Pictures |
|
Tree Inspired Foods |
|
Hand Tree Craft with Magazine Leaves |
|
Chlorophyll Experiment |
|
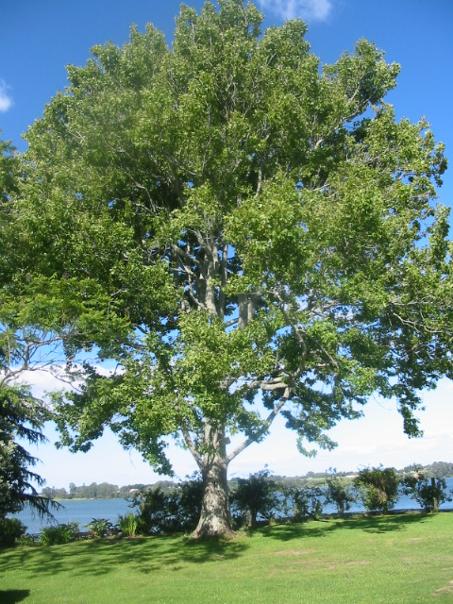
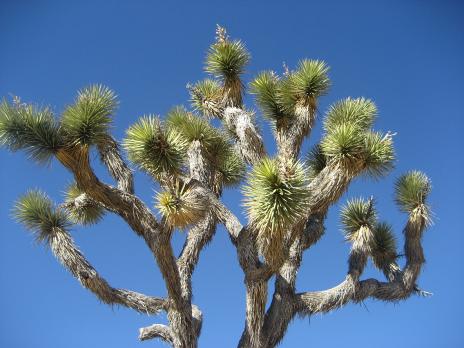
There are many unique trees like this Joshua Tree from Joshua Tree Park in California. |
|
Photo: C Wright |
|
|

|
Leaf Cookies |
|
|
|
Hand Tree Stamp |
|
|
|
Paper Roll Tree |