|
Pumpkins Autumn, Halloween and Thanksgiving always bring to mind bright orange pumpkins for me, so I thought we’d explore that big orange winter squash. This would be a great Theme Day to have just before you carve jack-o-lanterns as a family or before you attend a pumpkin festival or visit a pumpkin patch! Print out the Family Theme Day Planner and decide which activities you’d like to do and in what order.
INTRODUCTORY DISCUSSION: One of the interesting things I learned while we had this Theme Day is that pumpkin is a fruit, not a vegetable, and is actually a berry! (You learn something new every day!) For more information about pumpkins check here: http://www.thepumpkinfarm.com/faq.html
SONGS: If you have preschoolers check out this cute little counting song “5 Little Pumpkins Sitting on a Gate” - https://www.youtube.com/watch?v=cm1qvX1ygOo
I couldn’t think of a song with pumpkins in it for older kids. If you know one drop us a line at info@familythemedays.ca or on Facebook.
RHYMES:
For some preschool rhymes (and some that can be sung) check out this list: http://www.everythingpreschool.com/themes/pumpkins/songs.htm
“Peter Peter Pumpkin Eater” is a common nursery rhyme. Here’s a link to the poem: http://www.rhymes.org.uk/peter_peter_pumpkin_eater.htm
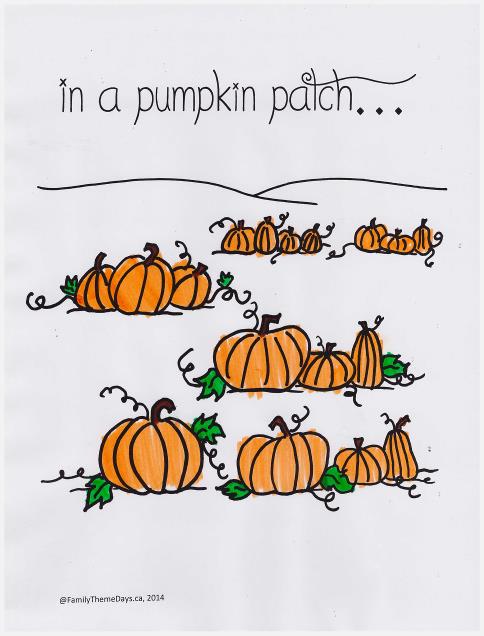
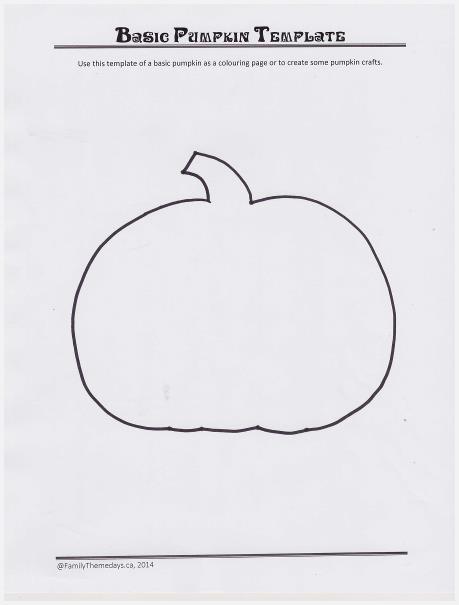
SCRAPBOOK ACTIVITIES: COLOURING PAGES: You can find many free coloring pages online by using your favourite search engine and typing in “Pumpkin Coloring Page” or print out my “In a Pumpkin Patch” Coloring Page. You could also print out one of my Pumpkin Templates and use that as a coloring page: Basic Pumpkin Template 1 and Basic Pumpkin Template 2.
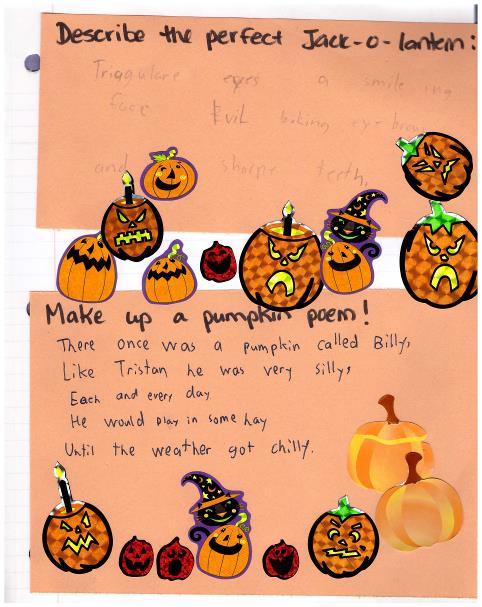
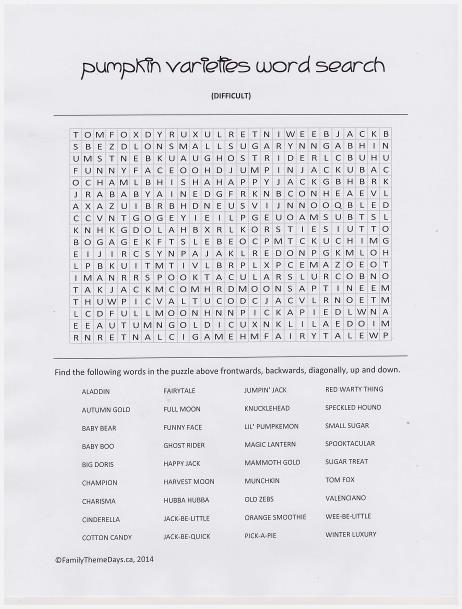
JOURNALING QUESTION PROMPT: Write out one or more of the following questions in your Family Theme Day Scrapbook or on a piece of paper to glue in your scrapbook: What are your favourite types of jack-o-lanterns: scary, funny, cute, a scene? Have you ever been to a pumpkin patch? Describe what it looked like or what you imagine it would look like? What would the best pumpkin festival be like? Choose the level of your child: ¨ Toddler – discuss the answer(s) out loud first and have your child draw a picture of the answer ¨ Preschooler/Kindergartener – discuss the answer(s) out loud first and write the answer down for him/her leaving one word for him/her to write out himself/herself with your help. You could also encourage him/her to draw a picture as well. ¨ Early Grade School – have your child either write out the answer himself/herself (encourage phonetic spelling) without your help, or offer to help with spelling each word out loud one word at a time. ¨ Grade School – have your child write a sentence or two on his/her own and then read over and discuss the response. (You decide whether to correct the spelling or not) ¨ Older Child – have your child write a longer response (paragraph). ¨ As A Challenge – instead of a question ask your older child to write a story or poem about pumpkins. PUZZLES: Print out a Pumpkin Word Search: Easy Pumpkin Word Search or Moderate Pumpkin Word Search or Difficult Pumpkin Varieties Word Search Here are the Pumpkin Word Search Keys: Easy Pumpkin Word Search KEY or Moderate Pumpkin Word Search KEY or Pumpkin Varieties Word Search KEY
BOOKS: Raid your child’s bookshelves to find any books with pumpkins in them. OR Go to the library with your child to find some books about pumpkins. OR Go to the library on your own to find books on about pumpkins from both fiction and nonfiction to have already on hand for your theme day. Many libraries allow you to go online and search for titles based on subject (Search for “pumpkins” or “Jack-o-lanterns” under “Children’s books”). Reserve them if you can to save time.
Here are some of Non-fiction titles about pumpkins:
· A Day at the Pumpkin Patch, text by Megan Faulkner and photographs by Adam Krawesky, Scholastic Inc., 2006—A class of kids visits a pumpkin farm and learns all about pumpkins.
· From Seed to Pumpkin, by Wendy Pfeffer and illustrated by James Graham Hale, HarperCollins Publishers, 2004 – A really good picture book to explain the lifecycle of a pumpkin.
· How Did That Get To My Table? Pumpkin Pie, by Emily J. Dolbear, Cherry Lake Publishing, 2010 – This would be a good book for beginner readers.
· Life Cycle Of A Pumpkin, by Ron Fridell and Patricia Walsh, Heinemann Library, 2009 – A great easy reader book with large print and lots of photos and illustrations to clearly teach your little one about the life cycle of a pumpkin.
· Play with Your Pumpkins, by Joost Elffers and Saxton Freymann and text by Johannes van Damn, A Joost Elffers Book, , 1998—Older kids will like this book as it offers more text and historical background but also has fun photographs of carved pumpkins using the stems as noses.
· Watch it Grow Pumpkin, by Barrie Watts, Smart Apple Media, 2002 – Another great beginner reader book but this one has beautiful close up pictures of all parts of the pumpkin’s life cycle.
Here are some picture books about pumpkins or jack-o-lanterns:
· Delicious! A Pumpkin Soup Story, by Helen Cooper, Doubleday, 2006, - Cat, squirrel and Cuck can’t find a pumpkin for pumpkin soup so they look for other ingredients but Duck will never eat any other type of soup.
· How Big Could Your Pumpkin Grow!, by Wendell Minor, Nancy Paulsen Books, 2013—This playful book imagines what it would be like to have pumpkins as big as lighthouses, roller coasters and skyscapers using some of America’s favourite places as inspiration.
· How Many Seeds in a Pumpkin? By Margaret McNamara and illustrated by G. Brian Karas, Schwartz and Wade Books, 2007—Charlie dislikes being the smallest in the class but after the class does an experiment with three pumpkins (small, medium and large) to see which one has the most pumpkins he is surprised by the results and learns that sometimes smallest is best! This book has math and science lesson to it in a subtle way.
· Pick a Perfect Pumpkin: Learning about Pumpkin Harvests, by Robin Koontz and illustrated by Nadine Takvorian, Picture Window Books, 2011 – Two kids visit a pumpkin farm.
· Pumpkin Town!, written by Katie McKy and illustrated by Pablo Bernasconi, Houghton Mifflin Company, 2006—José and his brothers grow the best pumpkins but one day when they throw away the smallest seeds the wind carries them to a town where the pumpkins grow and overtake everything! This book has fun college type illustrations.
· Pumpkin Jack, written and illustrated by Will Hubbell, Albert Whitman & Company, 2000 – This is a picture book but it explains the life cycle of a pumpkin in such beautiful way that it could be considered a non-fiction book
· The Runwaway Pumpkin, by Kevin Lewis and illustrated by S.D. Schindler, Orchard Books, 2003—Three kids find a giant pumpkin but when they cut it from the stem it rolls and rolls down the hill through the family farm!
· Sixteen Runaway Pumpkins, written by Dianne Ochiltree and illustrated by Anne-Sophie Lanquetin, Margaret K. McElderry Books, 2004— A rhyming tale of a raccoon named Sam collecting pumpkins in his wagon.
CRAFTS:
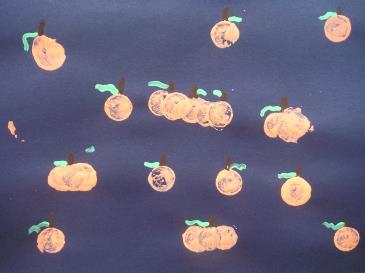
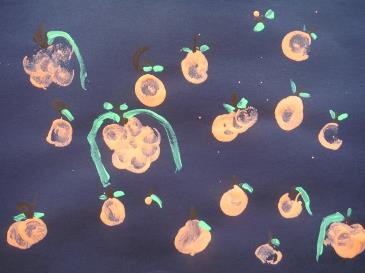
CORK STAMP PUMPKINS: Materials: Black paper, orange/brown/green paint, corks, fine paint brush, wax paper, art smock or old clothes to wear, newspaper or plastic to cover your work space, black marker (Optional).
Step 1: Have your children dip one end of a cork into orange paint (put a blob on the wax paper) and then stamp it on the black paper to create pumpkins of all sizes. Step 2: With a fine tipped paint brush have your kids pint on brown stems and then using the green paint add leaves or vines. Step 3: (Optional) If your kids want to turn this from Autumn/Thanksgiving pictures into Halloween pictures once the paint dries they can add jack-o-lantern faces to the pumpkins.
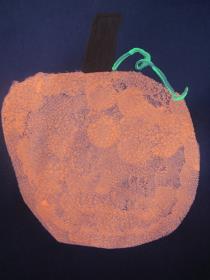
PUMPKIN STENCIL ART: NOTE I love how pumpkins can be in different shapes other than round. It’s fun to see what shapes there are when we pick out our pumpkins for Halloween carving. This craft is a nod to those funny shaped beauties!
Materials: Construction paper Black paper, orange/green/brown paint, paint brushes, sponge brush, wax paper, paper towels, jar of water, art smock or old clothes to wear, newspaper or plastic table cloth to cover your work area.
Step 1: Have your child drawn an oddly shaped circle or oval on construction paper. Hep him/her to cut it out in the center only keeping the paper intact. This is your stencil. Step 2: Place stencil over black paper and paint with orange paint (we used foam brushes to dab and press the paint on for a cleaner look). Carefully lift the stencil straight up and off the black paper to reveal the pumpkin! Step 3: Decorate with brown and orange paint to create a stem and vines or leaves. Step 4: (Optional) To make this pumpkin craft more suitable for Halloween your child could cut out a mouth and nose and eyes from coloured paper and then glue them on with a glue stick. OR your child could paint on the face.
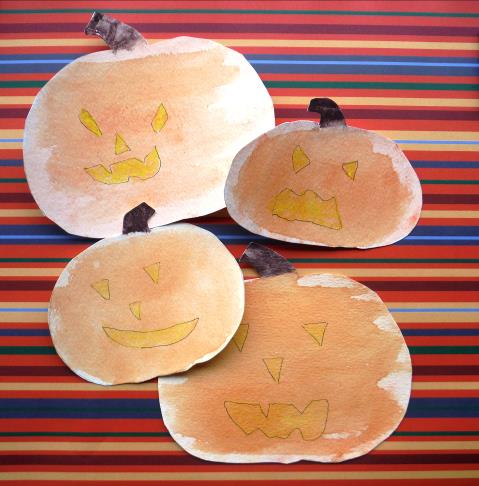
CRAYON RESIST PUMPKINS: Materials: Watercolour paper (or thicker paper), pencil watercolour palette of paints and brushes, a jar of water, yellow crayon, a copy of my Basic Pumpkin Template 1 for a bigger pumpkin or a copy of Basic Pumpkin Template 2 for two smaller ones, child safe scissors. Step 1: Have your child cut out the template he/she wants to use and then trace around the template on the watercolour paper using a pencil. Step 2: Now your child can cut out the pumpkin from the watercolour paper. Step 3: Have your child draw a Jack-0-lantern face on the cut out pumpkin using yellow crayon. Step 4: Using orange water colour paint brush the paint over the pumpkin face. The wax in the crayon will resist the paint and magically shine through. Well, at least that’s the theory. Sometimes it works for us and sometimes it doesn't. I think my boys didn’t use enough crayon this time around. We applied a second wash of watercolour to see it that would help but it didn’t improve them much Step 5: (Optional) If your crayon is faint you could have your child trace around it with black marker or a fine tipped pen like we did.
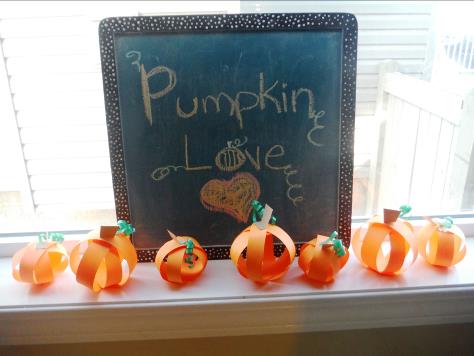
3D PAPER PUMPKINS: Materials: Orange paper, child safe scissors, glue stick, damp cloth for sticky fingers, brown paper, green twirling ribbon (I’m not sure what this is really called...but the kind of ribbon you can buy with the wrapping paper), clear tape. Step 1: To make the small pumpkins cut strips of paper widthwise on the orange paper and to make larger ones cut strips of paper lengthwise. You will need three strips per pumpkin. Step 2: Loop “strip one” (of three) and apply glue stick to one end. Press together both ends to make a loop. My son still likes to count to ten like he was taught in kindergarten to make sure the glue sticks. Step 3: Make the part of the loop that was attached with glue the bottom of the pumpkin. Make a second loop from “strip two “ but make sure it fits above the first loop and apply glue on the first loop to attach the two together. Make sure they are spaced apart, this give the illusion of a sphere. Step 4: Make a third loop using “strip 3” and glue it to the other two diagonally to make the sphere a little fuller. Now you have a cute little orange pumpkin. If you had bigger paper you could make a larger pumpkin and you might need three strips of paper to create a fuller pumpkin. We found three strips worked well for these small pumpkins. Step 5: Have your child cut out some brown pumpkin stems from the brown paper. Fold a little bit along the bottom of each stem so they can be glued to the top of the pumpkin (the non glued part of the loops). Step 6: Twirl little pieces of green ribbon and then tape them to the stem at the top of the pumpkin to create little vines. Step 7: Viola! Now you have some cute little pumpkins to adorn your window sill or decorate your thanksgiving table!
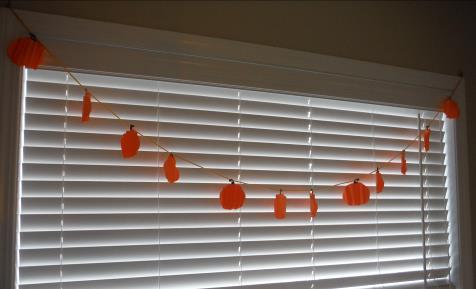
PUMPKIN GARLAND:
NOTE: I love having the kids create colourful garlands for our dining area window. Garlands are a simply way to add a little colour, especially since we don’t have a view of anything out that window.
Materials: Orange paper (preferably construction paper or something a little heavier), child safe scissors, pencil, a copy of my Basic Pumpkin Template 2, brown marker, hole punch, yarn, thumb tacks or bulletin board pins.
Step 1: Have your child cut out a pumpkin template and then trace it onto the orange construction paper as many times as you want...the more pumpkins the bigger the garland. To save time we folded the paper to cut a few pumpkins out at the same time (we traced on the top fold and cut through the layers). Step 2: Have your child colour a brown stem on the pumpkins (I suppose this step is optional but we liked the little detail). Step 3: Fold each pumpkin over and under like a fan to create a textured slightly 3D pumpkin. Step 4: Hold punch through each stem. Step 5: Measure out your yarn to fit your window or wall area and cut. Tie little loops at each end to fit over a thumb tack or bulletin board pin. Step 6: Loop each pumpkin through the yarn. Step 7: (Two people are needed for this task). Press a pin through one lopp and to the wall and then string across your window and attach the second pin. Step 8: Step back and enjoy!
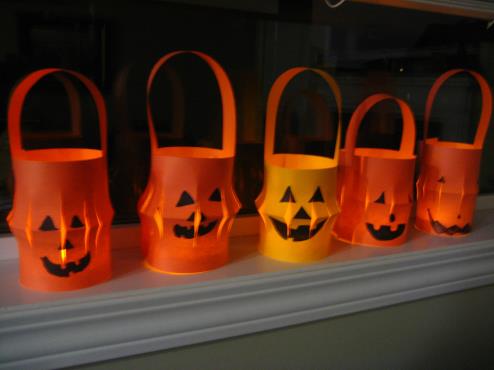
PAPER JACK-O-LANTERNS:
Materials: Orange paper, black markers, child safe scissors, glue stick or tape (or both), (Optional) LED tea lights.
Step 1: Cut your orange paper in half to make a long strip of paper. Step 2: Fold your strip of paper in half lengthwise. Step 3: Along the folded line about 2 cm/1 inch apart cut slits but be sure to not cut all the way to the other end of the paper , stop about 1.5cm/ 1/2 inch from the top. Step 4: Open the fold and have your child draw a Jack-o-lantern face in the middle of the strip with the eyes above the fold line and then nose and mouth under the fold line. A black Sharpie works great for this. Step 6: Glue or apply tape to one end of the strip and attach it to the other end. You can make the lanterns as fat or as skinny as you wish (if there is too much paper you can trim it to get your desired size. Step 7: Cut a thin strip of orange paper to be the lantern handle and glue or tape to the lantern. Step 8: (Optional) We really liked the effect of putting those battery operated tea lights in the middle of each lantern.
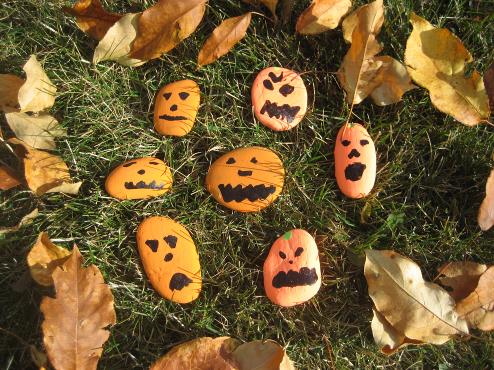
JACK-O-LANTERN ROCKS:
Materials: Stones, orange, black and green paint, waxed paper or paint pallet, brushes, jar of water, paper towels, newspaper or plastic to cover work space, art smock or old clothes to wear.
Step 1: Have your child paint the rocks orange paper and then leave them to dry on waxed paper. You may have to do a few coats to get them a nice bright orange and to paint both sides. Step 2: Once they are dry your child can now paint jack-o-lantern faces on the rocks using black paint. Step 3: (Optional) Add a green stem if desired. Step 4: Decorate your garden or front steps with your colorful rocks!
FOOD: There really are a plethora of pumpkin recipes out there and Jack-o-lantern themed treats. It was hard to narrow down what we’d make when we had this Theme Day. Search online or visit Pinterest for more ideas. As we discovered, Pumpkins are a berry (who knew). I decided to have a Pumpkin Top Food Challenge for my kids. Check back on the website for official “directions” on how to have your own Top Food Challenge. Basically I highlight a fruit once a month. I tell my kids why its nutritious and then they sample 4 or 5 variations. I’m trying to teach them that things taste different when they are prepared differently, so just because you may not like something cooked one way if you try it another way you might! Check our Facebook Album: Healthy Kids for pictures of past Top Food Challenges as well as our Pumpkin Top Food Challenge. SNACK: Pumpkin Seeds:
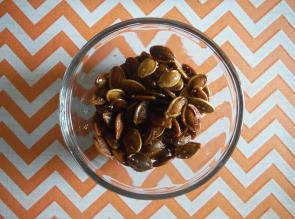
HEALTHY FACT: Pumpkin seeds are packed with fiber, vitamins, minerals, and health promoting antioxidants!
Ingredients: The seeds scooped out of a pumpkin, olive oil or vegetable oil, salt.
Step 1: Pre-heat the oven to 250F. Step 2: Rinse the seeds and pat dry with paper towel or dish towel. Step 3: Cover a baking sheet in tin foil and spread a few teaspoons of oil onto the sheet. Step 4: Spread the cleaned seeds around the oil to coat and then spread over the sheet so they are not touching. Step 5: Bake in the oven for about 1 hour. If you want them a bit browner turn the heat to 350F and then bake for 10 minutes more. I over cooked mine so they are a bit brown in the photo (I forgot to set the timer!).
Pumpkin Muffins: I made some for our Pumpkin Top Food Challenge (check out my Facebook Healthy kids Album for a photo). There are many recipes online and every autumn I try a new one. This year I tried this recipe for whole wheat pumpkin muffins : http://www.superhealthykids.com/blog/mr-bumpkins-whole-wheat-pumpkins.php
LUNCH:
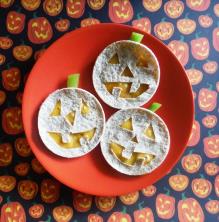
Jack-o-lantern Quesadillas: Use a circle cookie cutter or a cleaned out soup can to cut circles in tortillas. You need two per pumpkin. Carefully cut out a face in one of the circle tortillas. Place slices of orange cheddar on one of the tortillas and then cover with the face. In a heated and lightly oiled fry pan carefully lay the “pumpkin” and cook. Only cook one side to keep the face in tact. I tried to flip and heat the second side but you couldn’t really see the face when I did that so I left out that step when I made the other ones. You will know they are done when the cheese is all melty and the face sticks to the bottom. You can add a small piece of green pepper or celery for the pumpkins stem. Pumpkin Soup:
My family is mixed on pumpkin soup. I personally love it and my youngest does too, but not my Eldest nor my husband (I’ve tried a lot of recipes trying to find the perfect one to convert them). This time I roasted an actual Halloween pumpkin with the skin on. I drizzled olive oil and kosher salt over top and scattered sage and chopped red chili peppers on top and I roasted them at 400F for about 35 minutes. I scooped the pulp away from the shell, put it in a pot and covered with vegetable broth and then mashed with a potato masher. After it was heated up a bit I added a swig of maple syrup and then pureed with an immersion blender. I finished it up with a few tablespoons of heavy cream which I swirled into the pureed soup. I made this for our Pumpkin Top Food Challenge. My Youngest gave it 5 stars and my Eldest 3 stars so I’ll take that as a win! I think the spicy chili peppers made a difference as my kids love spice! Search your cookbooks or online for a recipe to try (or you could buy some form the store but I think homemade tastes much better even if it takes more time). Here’s a nice recipe to try that is simpler if your kids don’t like herbs and spices : http://thepioneerwoman.com/cooking/2011/11/pumpkin-soup/
Jack-o-Lantern Cheese Sandwich: Use a Pumpkin cookie cutter to create little Jack-o-lantern sandwiches using pieces of orange cheddar cheese as the face. If I find my cookie cutter soon I’ll post a picture of this idea on our More Goodies Album on Facebook.
DINNER:
Roasted Pumpkin:
Make this as a side for dinner for your kids to try. There are lots of ways to amp up the flavour including roasting with herbs like sage or with honey or maple syrup drizzled over top. We tried this recipe for our Pumpkin Top Food Challenge but I adjusted it to suit each of my boys taking out the salad aspect: http://www.jamieoliver.com/magazine/recipes-view.php?title=roasted-pumpkin-aamp-mozzarella Interestingly enough my Youngest (who likes roasted pumpkin pureed as a soup) didn’t really like this as a side, and my Eldest who didn’t like the soup as much really liked the roasted pumpkin with the cheese on it! Who can ever understand the palate of children?
Pumpkin Stew:
I found a gorgeous recipe here: http://www.superhealthykids.com/healthy-kids-recipes/baked-pumpkin-stew.php I really want to try this one day.
Stuffed jack-o-lantern Bell Peppers: Picky kids may not want to eat actual pumpkin but they might like little stuffed peppers carved to look like Jack-o-lanterns. I didn't cook the peppers because my kids prefer peppers uncooked. You can fill these with anything your kids like: sloppy joe mix, fry ground beef mixed with rice and veggies, couscous salad...
DESSERT:
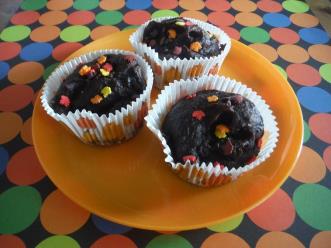
Pumpkin Pie: I love pumpkin pie and I must admit I make a mean cheesecake pumpkin pie for Thanksgiving every year. I’ve made it for years now and have lost my original source. You can find many pie recipes online to enjoy! Pumpkin Brownie Cupcakes: This is a cheaters recipe because it is soooo simple and it sneaks pumpkin in for picky kids to eat without knowing what they are eating. Take one store bought box of brownies and mix with one can of pumpkin puree and bake the brownies in cupcake papers. That’s it...you don’t need to add anything else. So simple and so good. Pumpkin Cookies : If it’s Halloween I’m sure there are loads of pumpkin shaped cookie cutters. Make some simple sugar cookies with this fun shape and tint the dough orange or decorate with orange icing. Enjoy! Pumpkin Cupcakes: Make your favourite cupcakes and decorate with orange icing and a little quirt of green icing. Easy peasy! Jack-o-Lantern Oranges:
These are adorable and I hope to try to make some soon. You can fill the carved orange with fruit salad, oatmeal, yogurt, chocolate mousse, sorbet... Check out the recipe here: http://chocolatecoveredkatie.com/2012/10/07/how-to-make-jack-o-lantern-oranges/
NOTE: There are so many cute pumpkin inspired treats out there: Rice Cereal Treats made into jack-o-lanterns, cupcakes arranged into a large pumpkin, Oreos dipped in orange chocolate and made into pumpkin shaped cookie pops… My Pumpkins Pumpkins Everywhere Pinterest board has a few fun recipe ideas posted.
LEARNING ACTIVITIES:
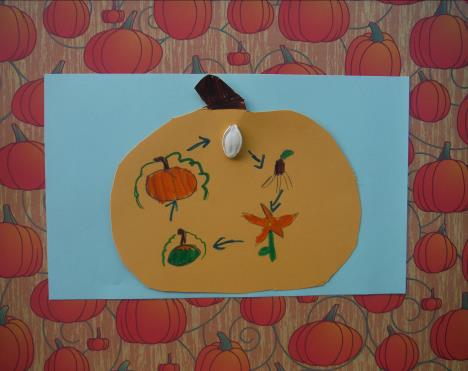
LIFE CYCLE OF A PUMPKIN: I was planning on a lifecycle worksheet but when I found this craft idea on Pinterest I decided to vary my idea. I found the idea here: http://www.iheartcraftythings.com/2012/10/life-cycle-of-pumpkin.html
Use my Pumpkin Template to trace onto orange construction paper to complete this learning activity. While reading through pumpkin books (the library has many with the life cycle of a pumpkin highlighted) have your child draw the 5 basic stages on the traced and cut out pumpkin: Seeds, sprout, blossom and vines, small green pumpkin, large ripened orange pumpkin. My son glued some seeds on instead of drawing them. You could also include a 6th stage if it is close to Halloween and have a Jack-o-lantern pictured! GROW A PUMPKIN: If you plant a seed in April you could have your own pumpkin to eat or carve by September or October! We read that you can start with a seed in a small pot and then transfer to a bigger pot. You will just need space for the long vines to spread and the fruit to grow! I’d like to try that one year! For a great book for younger kids with growing instructions try this: Grow Your Own Soup, by John Malam, Heinemann Library, 2012.
VARIIETIES:
There are so many fun and fanciful names of pumpkin varieties look some up with your kids. Try my Pumpkin Varieties Words Search to discover some of the names and then search online to see what they look like.
NUTRITION:
Search online for pumpkin nutrition to help your kids learn about why they should add pumpkin or other squash to their plates. It’s a low calorie fruit with fibre, anti-oxidants, minerals like copper, calcium and potassium, and vitamins like B-Complex. For Information about the nutrition of pumpkins here: http://www.nutrition-and-you.com/pumpkin.html
For Information about the nutrition of pumpkin seeds check here: http://www.nutrition-and-you.com/pumpkin-seeds.html
Have your own Top Food Challenge by making a few different Pumpkin recipes (see above under FOODS) and then get your kids to fill in my Top Food Challenge Worksheet.
WEBSITE: Want to learn all about pumpkins? Try this website: http://www.allaboutpumpkins.com/growing.html
For nutrition break-down of pumpkin try this page: http://www.nutrition-and-you.com/pumpkin.html
For basic information about pumpkins try here: http://en.wikipedia.org/wiki/Pumpkin For some fun facts try here: http://www.sciencekids.co.nz/sciencefacts/food/pumpkins.html
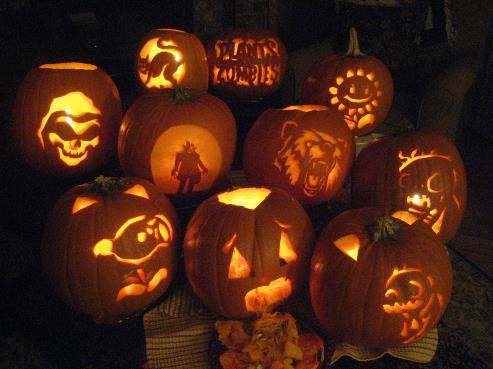
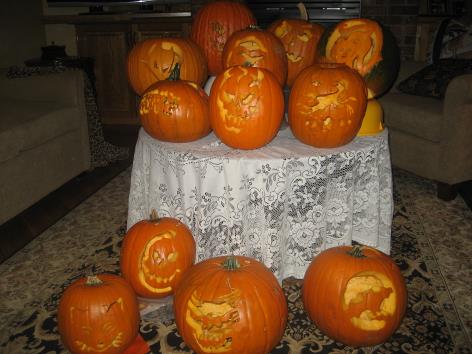
FOR FUN: PUMPKIN CARVING PARTY: This is one of our favourite activities in Autumn. My parents host a big pumpkin carving party every year and my kids and their older cousins plus aunts and uncles always come. We always have pizza and then take a large group photo of the awesome jack-o-lanterns we’ve all created! To find some stencils for your pumpkin creation try these sites: http://orangeandblackpumpkins.com/ http://www.pumpkinmasters.com/free-patterns.html
ONLINE GAMES: For an online jack-o-lantern game try this one: http://www.primarygames.com/holidays/halloween/games/halloweenpumpkins/ For virtual pumpkin carving try this: http://www.abcya.com/pumpkin_carving.htm
JOKES: Q: Why was the Jack-o-lantern afraid to cross the road? A: Because it had no guts!
Q: What sport do pumpkins like the most? A: Squash
Q: How do you mend a Jack-o-lantern? A: You use a pumpkin patch!
EXTENDED ACTIVITIES: AUDIO VISUAL: Search through your child’s DVD/ video collection (or visit your local library before hand) to find your child’s favourite with pumpkins in them. Spookley the Square Pumpkin, Holiday Hill Enterprises, 2013 The Berenstain Bears: Pumpkin Party!, Nelvana Limited, 2013
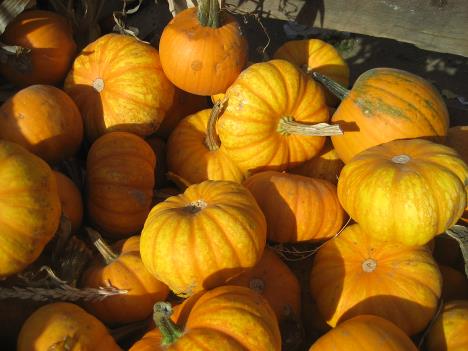
FIELD TRIP: Go shopping for a pumpkin to carve for Halloween! Go to a pumpkin patch if you are lucky enough to live near one. Attend a local pumpkin or harvest festival. |
|
Pumpkins Galore! |
|
Journaling about Pumpkins |
|
Using Corks as Stamps |
|
Pumpkin and Jack-o-lantern Inspired Foods |
|
Pumpkin Stencil Craft |
|
Crayon Resist Jack-o-Lanterns |
|
3D Paper Pumpkins |
|
Paper Pumpkin Garland |
|
Paper Lanterns for Halloween |
|
Halloween Rocks! |
|
Pumpkin Life-Cycle Craft |

|
Photo: C Wright |
|
Pumpkin Patch Coloring Page |
|
|
|
|

|
|

|
Pumpkin Varieties Printable Word Search |
|
Have a Pumpkin Carving party! |
|
Basic Pumpkin Template 1 |
|
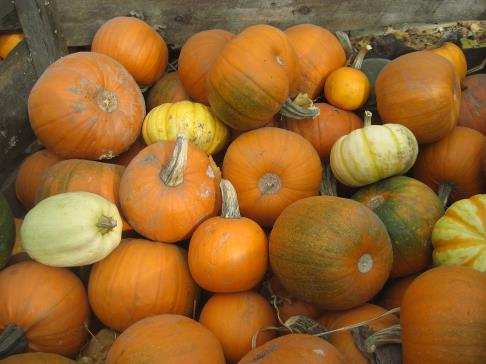
Visit a Pumpkin Farm! |
|
Photo: C Wright |