|
Monsters It doesn’t have to be October and Halloween time to enjoy a Monstrous Theme Day, and your child doesn’t have to be interested in scary monsters (like vampires and werewolves) or even classical monsters from Greek mythology for this Theme Day as there are many friendly monsters out there, too (think Monster’s Inc., and Sesame Street). My kids are fascinated with monsters (I blame Scooby) so we enjoyed reading up on some classical and literary creatures. For some ghoulish fun, try this Theme Day. Print out the Family Theme Day Planner and decide which activities you’d like to do and in what order.
INTRODUCTORY DISCUSSION: If your child is afraid of monsters keep discussing how they are imaginary and not real. If you can get a child to see that monsters are just made up for stories they might lose their scariness. You know your child best though, and if you think even focusing on friendly monsters would be too much for your son or daughter pass on this Theme Day.
SONGS: There are many songs featuring monsters, see what you can find on your favourite music provider for a monstrously good time. Here’s just a few of them: · “Werewolves of London,” by Warren Zevon’s · “The Purple People Eater,” by Sheb Wooley · The most famous monster song is perhaps “The Monster Mash” by Bobbie Boris Picket.
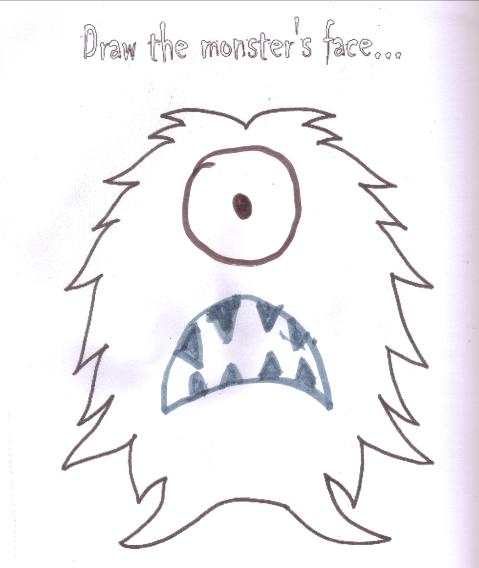
SCRAPBOOK ACTIVITIES: COLORING PAGES: You can find many free colouring pages online by using your favourite search engine and typing in “monsters coloring pages” or print out my “Draw the Face on the Monster” Colouring Page.
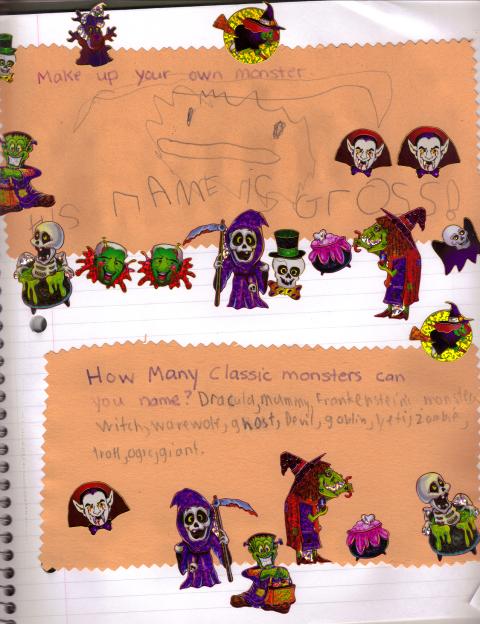
JOURNALING QUESTION PROMPT: Write out one or more of the following questions in your Family Theme Day Scrapbook or on a piece of paper to glue in your scrapbook: How many classic monsters can you name? Why are monsters so fascinating to some people? What is your favourite monster? Can you think of some friendly monsters? Make up your own monster (describe it, name it and draw it). Choose the level of your child: ¨ Toddler – discuss the answer(s) out loud first and have your child draw a picture of the answer ¨ Preschooler/Kindergartener – discuss the answer(s) out loud first and write the answer down for him/her leaving one word for him/her to write out himself/herself with your help. You could also encourage him/her to draw a picture as well. ¨ Early Grade School – have your child either write out the answer himself/herself (encourage phonetic spelling) without your help, or offer to help with spelling each word out loud one word at a time. ¨ Grade School – have your child write a sentence or two on his/her own and then read over and discuss the response. (You decide whether to correct the spelling or not) ¨ Older Child – have your child write a longer response (paragraph). ¨ As A Challenge – instead of a question ask your older child to write a story or a poem about monsters.
PUZZLES: - maybe make a challenging one???
Print out a monster Word Search: Easy Monsters Word Search or Difficult Monsters Word Search.
Check here for the answer keys: Easy Monsters Word Search Key or Difficult Monsters Word Search Key.
BOOKS:
Raid your child’s bookshelves to find any books with monster characters in them. OR Go to the library with your child to find some books about monsters. OR Go to the library on your own to find books about monsters from both fiction and nonfiction to have already on hand for your theme day. Many libraries allow you to go online and search for titles based on subject. Reserve them if you can to save time.
Try to find some of these monster picture books:
· Do Not Build A Frankenstien, by Neil Numberman, Green willow Books, 2009 – A little boy new to the neighbourhood tries to explain to other children why they shouldn’t build a Frankenstien but in the end when the monster finds them the children decide a Frankenstien is a lot of fun.
· Goodnight Little Monster, by Helen Ketteman and illustrated by Bonnie Leick,Marshall Cavendish Children, 2010 – This is a gentler monster book for little ones using cute illustrations and a soothing rhyming story.
· Everything I know About Monsters: A Collection of Made-up Facts, Educated Guesses and Silly Pictures about Creatures of Creepiness, by Tom Lichtenheld, Simon & Schuster Books for Young Readers, 2002—This is a fun book where a little boy makes up facts about monster.
· Frank was a Monster Who Wanted to Dance, written and illustrated by Keith Graves, Chronicle Books, 1999—This is a silly book (and slightly gross for those kids who seem to like that) about a monster named Frank and what happens when he dances.
· If you’re a Monster and You Know It, by Rebecca Emberley & Ed Emberley, Orchard Books, 2010—This would be great for little ones as it parodies the song “if your happy and you know it” and allows your kids to snort, stomp, and smack their claws! It also gives a web address to download the tune as sung by Adrian Emberley.
· Monsters Don’t Eat Broccoli, by Barbara Jean Hicks and illustrated by Sue Hendra, Alfred A, Knopf, 2009 – This one features whimsical not scary monsters who are explaining that they’d rather eat tractors or rocket ships than broccoli, but at the end when they are eating trees you realize the monsters are really children who actually realize broccoli isn’t so bad after all.
· Monster Museum, by Marilyn singer and illustrated by Gris Grimly, Hyperion Books for Children, 2001 – Featuring poems about many classic monsters this book has illustrations full of great and fun details that tell a story of their own.
· Monsters Party All Night Long, by Adam J.B. Lane, chronicle Books, 2004 – With fabulous 3-D illustrations, this book has a lonely Dracula invite other monsters over for a party.
Here are some books about monsters with interesting facts or monster tales around the world:
· The Barefoot Book of Monsters!, by Fran Parnell and Sophie Fatus, Barefoot Books, 2003—This book features six tales of monsters from six different countries.
· The Essential Worldwide Monster Guide, by Linda Ahsman and illustrated by David Small, Simon & Schustr books for Young Readers, 2003 – The book has poems about thirteen different creatures and a brief fact about where in the world each creature originated. It includes the well-known Loch Ness monster and Siren’s from Greek mythology, but also has a number of creatures we had never heard of from different places like the Russian spirit Domovik, Ravana from India, tengu from Japan, and the adlet of Canada and Greenland.
· Fabulous Monsters, retold and illustrated by Maria Williams, Candlewick Press, 1999 – Using both text and comic book format, this book retells the story of five monsters: the Basilisk, the Bunyip, Grendel, the Chimera and Isikukumanderu.
· Mythological Monsters of Ancient Greece, by Sara Fanelli, Candlewick Press, 2002 – Using fun collage illustrations this book looks at a number of different creatures from Greek Mythology.
· Myths and Monsters Secrets Revealed, by Katie Edwards and illustrated by Simon Mendez, Charlesbridge, 2004, Ten mythical creatures are explored in this book by examining the myth and perhaps what truthful things inspired the stories in the first place.
For poems about monsters try this title:
· Making Friends with Frankenstein: A Book of Monstrous Poems and Pictures, by Colin McNaughton, Candlewick Press, 1994 – With over fifty poems and lots of fun illustrations this one will has a lot to offer.
CRAFTS:
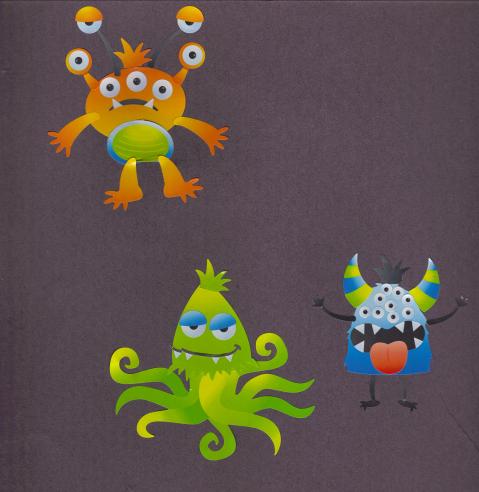
STICKER COLLAGE OR PICTURE:
Materials: Stickers of monsters (sort through your old Halloween stickers) or see if you can find “make your own monster” stickers like we used, coloured paper, (Optional) crayons or markers.
Step 1: Give your child the stickers and have him/her stick them to the coloured paper to make a collage or scene. Step 2: (Optional) If your child wants to, he/she could embellish the picture using crayons or makers creating further details, designs or a background.
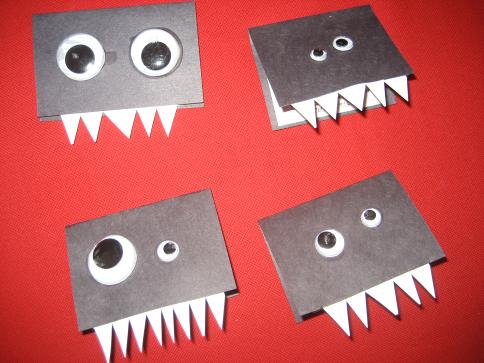
MONSTER CARDS:
NOTE: My eldest son had a Monster Themed Party for his 9th Birthday and we made these cards as invitations. Once the craft was finished I simply typed out the party information on the computer and printed them out to then cut and paste inside the monster’s mouth.
Materials: Cardstock or construction paper (we cut each card in two to create two per card), black paper (or whatever colour you want the monster to be if your card stock isn’t the right colour), glue stick, white glue, child safe scissors, googly craft eyes, white paper.
Step 1: If you are using construction paper decide on the size of your monster and cut to size. Then you will fold the paper over to create a card. If you are using blank cards found at a craft store you will not need to do this but you can still cut them if you wish to make smaller monsters as we did. Step 2: Cut black (or whatever colour you are using) to fit both the front and back of the folded card. Note: if your card stock is already coloured you can skip this step. Step 3: Glue the black (coloured) paper to the card stock. Step 4: Cut out small triangles from the white paper to use as teeth. Step 5: Apply a small amount of glue from a glue stick to the end of each triangle and glue inside the card so that most of the triangle is seen sticking out when the card is closed. These are the monster’s teeth. Step 6: Use white glue to attach googly craft eyes to the front of the card. We liked the effect of using two different sized eyes. Step 7: Let the white glue dry. Step 8: If you want you can use a glue stick to glue a red tongue shape to the inside of the card or you can glue a message inside as we did for my son’s party invitations.
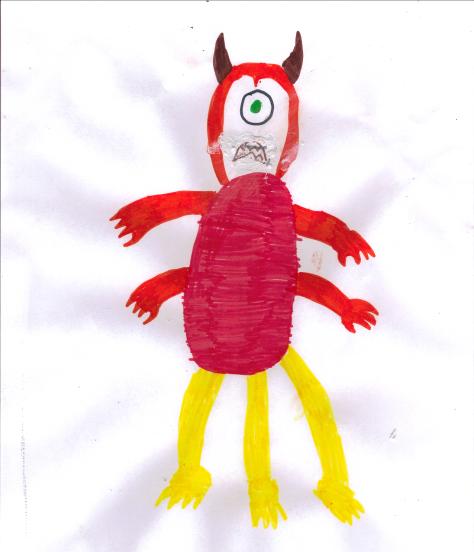
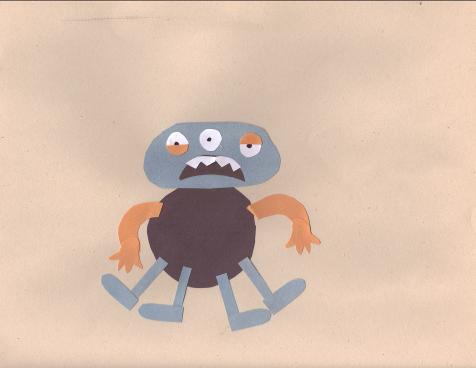
SHAPE MONSTERS:
NOTE: This is one of the oldest craft ideas in our family. My eldest son’s fascination with monsters started when he was probably 2 ½ (I blame my husband and Scooby for this) and one day when we were making crafts he asked me to make a monster. The end result was this craft which we often revisit.
Materials: Various pieces of coloured paper (this is a good craft to use paper scraps), child safe scissors, glue stick, damp cloth for sticky fingers.
Step 1: Ask your child to pick a colour and a shape for the body of the monster. Help younger children to cut this shape out of paper or get older children to do it on their own. Step 2: Have them glue the body to a sheet of paper OR leave it loose if it is a large shape and have your child glue the other body parts onto the body creating a free-standing flat monster instead of a picture as we have shown to the right. Step 3: Ask your child to pick a colour and a shape for the head of the monster. Help younger children to cut this shape out of paper or get older children to do it on their own. Step 4: Ask your child to pick a colour and a shape for other body parts: legs, arms, claws, horns, a tail, eyes (ask how many), a mouth etc., and help younger children to cut these pieces out or have older children do it themselves. Step 5: Have your child glue all the pieces together to form their very own monster! They could also use markers or crayons to add further details (like scales or hair or pupils in the eyes). Step 6: Display or glue into your Family Theme Day Scrapbook (if it fits)!
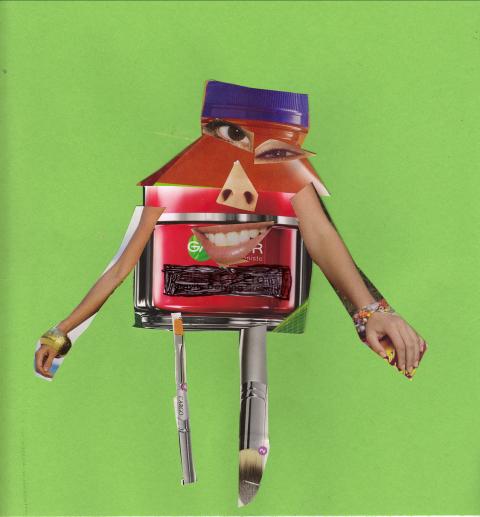
MAGAZINE COLLAGE MONSTERS:
NOTE: This is another old craft idea in our family, again created for my eldest son when he was much younger. We would usually staple folded coloured paper together to make a book and on each page create a different monster which my son would name (often quite humorously). These books are often, and fondly, revisited by my son who still thinks they are funny! He loves this craft!
Materials: Coloured paper, old magazines that can be torn and cut, child safe scissors, glue stick, damp cloth for sticky fingers, (Optional: stapler and marker or pen if you are making a monster book).
Step 1: (Optional) If you are making a monster book fold your coloured paper in half and place together to form a book with pages and then staple along the side. Step 2: Flip through old magazines with your child and pick out objects (like furniture) or patterns or colours that can be cut into body shapes. I love the effect of cut a shape from those big shampoo ads to create a furry body. Step 3: Have your child glue the “body” onto the coloured paper. Step 4: Next look for other things to glue onto the body like arms and mouths from people, animal body parts, things like bottles to use for horns, and even different eyes (for a creepy effect try different sized and coloured eyes from two different ads), and have your child glue them onto his/her creature. Step 5: Make as many creatures as your child wants or enough to fill your little booklet if you are making a book. Step 6: Ask your child to name the creature and add the funny name to the picture if you want.
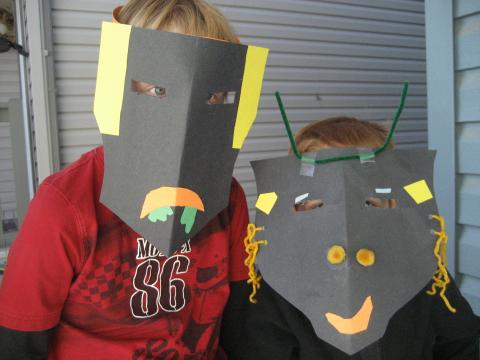
PAPER MONSTER MASKS:
Materials: Construction paper (harder paper like this is more sturdy for a wearable craft), bits of coloured paper, pipe-cleaners, googly eyes, glitter, sequins, pieces of material or felt, white glue, glue stick, tape and stapler. (Have fun checking through your craft supplies for things to add to the mask).
Step 1: The basic premise of this mask is a headband with a monster face that hangs down over your child’s face so the first step is to cut a strip of construction paper that will fit around your child’s head. Loop it around your child’s head and then pinch it together in the right spot. You can staple it or use a glue stick or tape to do this. Step 2: Next ask your child what colour he/she wants the face to be and cut an interesting shape from that paper which will eventually be glued or taped to the headband. To keep my sons’ shapes symmetrical I fold the paper in half before cutting which made a useful bend to fit my children’s faces better. Step 3: Hold the mask up to your child and determine where the eyes should be. (Parent step) Poke a hold in the correct spot and cut out an eye shape. My boys wanted rectangular eyes but you can do any shape. Step 4: Let your child have fun decorating the mask. My eldest prefers simplicity so he didn’t want to add much. My youngest hates it when his brother is finished before he is so while he started to add materials he quite once big brother said he was done. You can have a lot of fun with this mask though using many different craft supplies. Step 5: Once the mask is decorated and the glue is dry attach the face portion to the headband. We used tape. Step 6: Let your little monsters where their masks around the house. You could encourage them to create a story and a play using the masks as costumes.
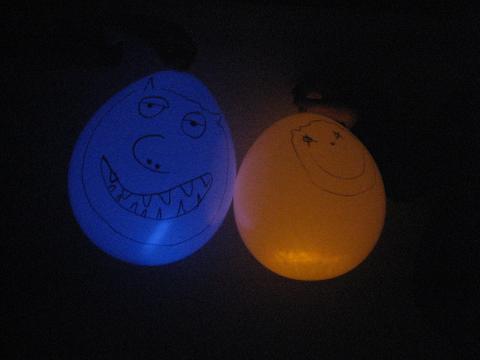
GLOWING BALLOON MONSTERS:
NOTE: This craft works best with two steady hands so either two parents or a parent and an older child. While this was difficult to make it was so worth it as my boys absolutely loved the end product!!
Materials: A white balloon, a permanent marker, a glow stick (we found ours at a dollar store), string.
Step 1: (Adult step) Blow up the balloon for your child and pinch the top but don’t tie it together yet. Step 2: Hold the balloon firmly while your child draws a monster face onto it. Step 3: Continue to pinch the balloon closed so no air escapes. Have your child bend the glow stick to activate it. Step 4: (Adult step) This was the hardest part of this craft. I quickly, yet gently, inserted the glow stick through the lip of the balloon trying hard not to let too much air escape. Then I had to gently try to push the glow stick down into the balloon. Once it dropped into the inflated balloon I added a bit more air and then tied it up. Step 5: Add string to the knot so the balloon can be hung somewhere. We want to make these on Halloween night to hang on our tree. Step 6: Go to a dark room with no windows and turn out the lights to see how the monsters glue!!
DRAW YOUR OWN:
If your child likes to draw there are many “How to Draw...” books that focus on monsters. Try this one: Monsters! Draw Your Own Mutants, Freaks & Creeps, by Jay Stephens, Lark Books, 2007.
FOOD:
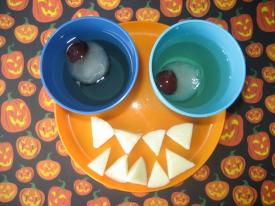
Monster eye ice cubes – grape or cranberry juice seedless grapes muffin tin – ½ hour freeze until slushy then add grape juice and freeze until solid.
SNACK: Monster Eyeball Ice Cubes in Juice:
NOTE: Make this before your Theme Day and the time you want to drink this!
Ingredients: Grape or cranberry juice, seedless grapes, muffin tin (mini or large depending on the size of eyeballs you would like to make) or ice cube tray (for a different shaped eye), juice or water for you child’s snack drink!
Step 1: Pour some juice into a muffin tin or ice cube tray and set in the freezer for about 30 minutes until it is slushy or frozen. Step 2: Add a grape for each eye and then cover with more juice. Set back in the freezer for about an hour until it freezes solid. Step 3: Pour a glass with your child’s snack drink and then add an eyeball ice cube for a ghoulish look! NOTE: I added apple slices cut into triangles for teeth to complete this snack!
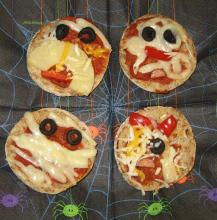
LUNCH:
Mini Monster Pizzas: Make mini pizzas using whole wheat English muffins, pizza sauce or tomato sauce mixed with dried herbs and garlic powder, and fun toppings to create faces like halved pineapple rings, olives, red or green or yellow peppers, pepperoni slices etc. Toast the English muffins first so they don't get too soggy and then spread with tomato sauce. Next, have your kids create the faces with the toppings that they love.
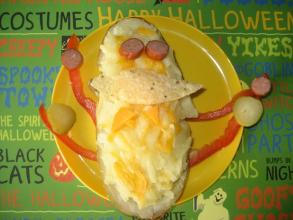
DINNER:
Double stuffed monster potatoes: To make double stuffed potatoes you first need to bake some potatoes (oven at 425F, rub potatoes in olive oil, prick with a fork all over and then bake for 60 minutes). Once the potatoes are baked and cooled enough to handle, cut them in half and carefully scrape out the inside of the potatoes into a large bowl. Make sure to keep the skins in tact. Mix shredded cheddar cheese, butter or margarine, sour cream and salt and pepper into the potatoes and mash until the consistency you like. Taste as you go to see if you need to add any more ingredients. If you want to get sneaky you can add some puréed vegetables in this mixture as well like cauliflower or carrots or sweet potato. Once the mashed mixture is ready you scoop it back into the potato skins. Set the stuffed skins on a baking tray lined with tin foil and sprinkle with cheese. Put under broiler for about 2 minutes to melt the cheese. Now they are ready to decorate as monsters! Give your kids corn chips, bacon pieces, broccoli, olives, pepper slices, cut cheese etc. to decorate them.
NOTE: One of our potatoes broke when I was scooping out it out and trying to restuff it so I had to think fast and decided to put the mashed potato mixture into a ramekin and decorated that to look like a monster. This worked just as well! To see my ramekin potato monster go to our Facebook page and check out the More Goodies Photo Album: http://www.facebook.com/pages/Family-Theme-Days/194379807256174
DESSERT:
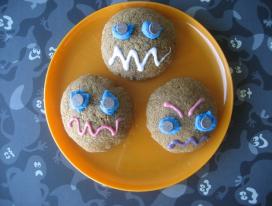
Monster Faced Cookies:
Make your favourite cookie recipe and then when the cookies are cooked and cooled add dots of colour icing and then chocolate chips or M&M’s for eyes! We used pumpkin cookies because they seemed fitting for Halloween!
Monster Cookies:
NOTE: To see a picture of some Monster Cookies go to our Facebook page and check out the More Goodies Photo Album: http://www.facebook.com/pages/Family-Theme-Days/194379807256174
Monster Cookies is the actual name of a real type of cookie and I have seen many recipes for it. The simplest would be to use your favourite chocolate chip cookie or oatmeal cookie or peanut butter cookie recipe and instead of chocolate chips or raisins etc., add chopped up pieces of chocolate bars and candy coated chocolates like M&Ms and Reese’s Pieces. I found one Monster recipe on Pinterest which you can find on my Family Theme Day Fun Pinterest account or go to this blog for the original recipe.: http://www.confessionsofacookbookqueen.com/2012/04/monster-cookies/
LEARNING ACTIVITIES:
WEBSITE:
This is a good site with all sorts of monsters on it like mythological ones: http://www.monstrous.com/
For any kids interested in Cryptids try this site: http://www.newanimal.org/. To find out what Cryptids are check here: http://en.wikipedia.org/wiki/Cryptid
FOR FUN: DRAWING GAME: Create a unique monster by rolling the dice and drawing. Give your kids a sheet of paper and a single die each. Have them first draw a roundish body and then tell them to roll the die. After the first roll announce that this is the number of arms the monster now has and let them draw in the arms. After the second roll announce that this is the number of legs and have them draw the legs. For each roll announce another body party like heads or eyes, tails, teeth, claws and horns.
WORD SCRAMBLE: Print out a copy of my Monster Word Scramble Sheet and have your older child try to figure out which monsters are being listed. Check here for the answer key: Monster Word Scramble Answer Key. CHARADES: Print out a copy of my Monster Charades Sheet and cut out the names of the monsters. Put the names in a empty jar or a paper bag and have each family member pull out a name and silently read it (help younger children by whispering in their ear and then letting other family members guess). Now each individual must silently act out the creature and the others must guess who he/she is. JOKES: Q: What monster loves to dance? A: The Boogey Man
Q: What game do monsters like to play? A: Hide and Go Shriek!
Q: What is the best thing to do if a monster breaks through your front door? A: Run out your back door!
EXTENDED ACTIVITIES: AUDIO VISUAL: Search through your child’s DVD/ video collection (or visit your local library before hand or the Video Store) to find your child’s favourite shows with monsters as characters. For young children try these titles:
· Any episode of Sesame Street with their friendly monsters
Other kids might like these titles:
· Any episode of Scooby doo · Monsters Inc. · Monsters vs. Aliens
For Something more educational and for animal lovers try this title (although some scenes are yucky in my opinion):
· DK Eyewitness: Monster, Schlessinger Media, 2004—Looks at some of the animals etc. that may have inspired mythical monsters.
FIELD TRIP: If you do this Theme Day around Halloween see what community events are occurring locally and attend one of those spooky activities if your child isn’t too frightened of these things.
|
|
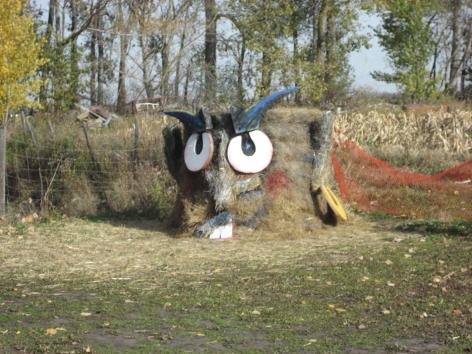
Photo: C Wright |
|
Have a monstrously fun day! Prairie Gardens, Bon Accord, Alberta |
|
Journaling about Monsters! |

|
Monster Sticker Scenes |


|
Monster Card Mouths |

|
Shape Monster |

|
Magazine Monster |

|
Paper Monster Masks |

|
Glowing Balloon Monsters |

|
Monster Inspired Foods |
|
Draw the Monster’s Face Printable |

|
|
|
Monster Drawing Game |

|
Monster Charades Printable |