|
Horses
Whether you have an animal lover or a little cowboy/cowgirl in your household horses as very appealing to children. Any time is the perfect time to horse around a bit and try this Theme Day to learn more about these beautiful creatures. Print out the Family Theme Day Planner and decide which activities you’d like to do and in what order.
SONGS: For a horse lullaby try “All the pretty little horses.” For lyrics check here: http://www.babycenter.com/0_lullaby-lyrics-all-the-pretty-little-horses_6739.bc For a horseback riding song try “Happy Trails,” by Roy Rogers and Dale Evans. For a song about horse racing sing “Camptown Races,” by Porter Wagoner. For a contemporary song that sort of fits the theme try U2’s “Who’s Gonna Ride Your Wild Horses.”
RHYMES: For a nursery rhyme about horses try “I had a little Hobby Horse” and to check out some meaning behind it look here: http://www.rhymes.org.uk/a33-i-had-a-little-hobby-horse.htm
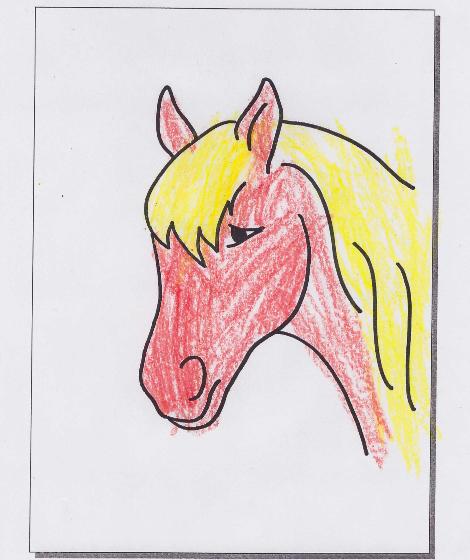
SCRAPBOOK ACTIVITIES: COLORING PAGES: You can find many free coloring pages online by using your favourite search engine and typing in “Horse coloring pages” or print out my Horse Coloring Page or my Horse Template Printable.
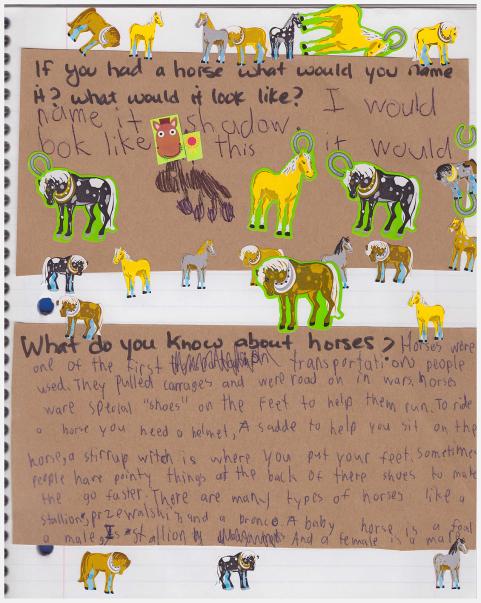
JOURNALING QUESTION PROMPT: Write out one or more of the following questions in your Family Theme Day Scrapbook or on a piece of paper to glue in your scrapbook: What do you know about horses? Would you like to ride a horse? Where would you like to ride a horse? If you had a horse what would you name it? How do you take care of a horse? What would you like to learn about horses? Choose the level of your child: ¨ Toddler – discuss the answer(s) out loud first and have your child draw a picture of the answer ¨ Preschooler/Kindergartener – discuss the answer(s) out loud first and write the answer down for him/her leaving one word for him/her to write out himself/herself with your help. You could also encourage him/her to draw a picture as well. ¨ Early Grade School – have your child either write out the answer himself/herself (encourage phonetic spelling) without your help, or offer to help with spelling each word out loud one word at a time. ¨ Grade School – have your child write a sentence or two on his/her own and then read over and discuss the response. (You decide whether to correct the spelling or not) ¨ Older Child – have your child write a longer response (paragraph). ¨ As A Challenge – instead of a question ask your older child to write a story or a poem about horses. PUZZLES: Print out a Horse Word Search: Easy Horse Word Search or Difficult Horse Word Search. Check here for the answer keys: Easy Horse Word Search Key or Difficult Horse Word Search Key.
BOOKS: Raid your child’s bookshelves to find any books with horses in them. OR Go to the library with your child to find some books about horses. OR Go to the library on your own to find books about horses from both fiction and nonfiction to have already on hand for your theme day. Many libraries allow you to go online and search for titles based on subject (Search for “Horses” under “Children’s Books). Reserve them if you can to save time.
Read some of these nonfiction/learning titles if you can find them:
From Foal to Horse, by Robin Nelson, Lerner Publications Company, 2003—This is a good beginner reader’s book as it offers large and easy text.
· Horses, by Gail Gibbons, Holiday house, 2003—Even though this has illustrations like a picture book it is really great learning book that looks at the history of horses, breeds of horses, and other facts.
· Horses: How to Choose and Care for a Horse, by Laura S. Jeffrey, Enslow Publishers, Inc., 2004—This is part of the American Humane Pet Care Library series and would be a good one if your family is thinking of buying a horse.
· How to Speak horse: A Horse-Crazy Kid;s Guide to Reading Body language and “Talking Back,” by Andrea and Markus Eschbach, translated by Julia Welling and photos by Horst Stretferdt, Trafalgar Square, 2008—Lots of text but older horse-loving kids will eat this book up as it has a lot of great information.
· I Wonder Why Horses Wear Shoes and Other Questions About Horses, by Jackie Gaff, Kingfisher, 2011 – This book answers many questions kids have about horses like how fast do horses move? Why do horses need grooming? Are there any wild horses left?
· Learn to Ride, by Sandy Ransford, QEB Publishing 2001—Part of the I Love Ponies series, this one would be good for children about to take riding lessons. The text is simple and the information useful. Other books in the series include “At the Show,” “Pony Care,” and “Pony Club.”
· Show Jumping, by Robin Johnson, Crabtree Publishing Company, 2010—A great look at show jumping with detailed text but not overwhelming. This is part of a series called Horsing Around. Other books in the series include “Cross-Country And Endurance,” “Trail Riding,” “Dressage,” “Rodeo,” and “Steeplechase.”
Here are some horse picture books worth looking at:
· Gallop-o-Gallop, by Sandra Alonzo and pictures by Kelly Murphy, Dial Books for Young Readers, 2007—This is a book of different poems all about horses.
· H is for Horse: An Equestrian Alphabet, by Mike Ulmer and illustrated by Gijsbert van Frankenhuyzen, Sleeping Bear Press, 2004—Each letter of the alphabet has a poem plus some factual information about horses.
· Horseplay!, by Karma Wilson and illustrated by Jim McMullan, Little, Brown and Company, 2012—A farmer wonders why his horses are sleeping all day. What do they get up to at night? Why horseplay of course!
· Seabiscuit: The Wonder Horse, by Meghan McCarthy, Simon and Schuster Books for Young Readers, 2008—The story of a real race horse from the 1930’s.
Chapter Books:
NOTE: Back in my “Tween days” (when the word “Tween” didn't even exist) I was crazy for horse books so I feel I must mention these titles for older children who read chapter books.
· Black Beauty, by Anna Sewell
· The Black Stallion, by Walter Farley—I loved all the Black Stallion books when I was younger!
· Lucky, Lucky White Horse, by Beryl Williams Epstein—It is probably very hard to find this book but I remember this simply for the rhyme about counting 100 white horses.
CRAFTS: STICKER OR STAMP COLLAGE:
Materials: Assorted horse stickers or stamps (with an ink pad), paper, and crayons or markers (Optional).
Step 1: Give your child the stickers or stamps and ink pad and have him/her create his own collage or scene using them. Step 2: If your child wishes, he/she may decorate or embellish the scene or collage with crayons or markers.
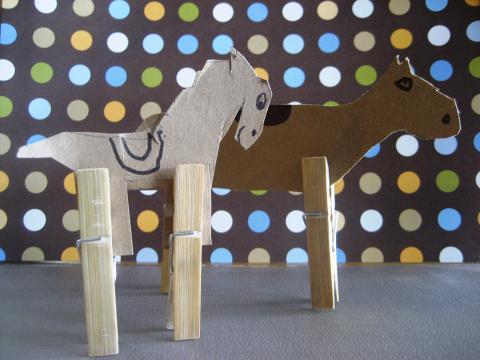
CLOTHES PIN HORSES:
Materials: Cardboard or construction paper, pencil and markers, child safe scissors, two clothespins per horse.
Step 1: Attach the clothes pins to the bottom of the hard paper (you must use construction paper or cardboard for this as thin paper will not hold the pins). Step 2: Let your child draw a horse on the paper—encourage your child to envision the clothespins as legs! Step 3: Go over the drawing in marker so it will be clearer to see and have your child cut the picture our (or help younger kids by cutting it for them). Step 4: With the clothes pins attached you can now stand the horse upright!
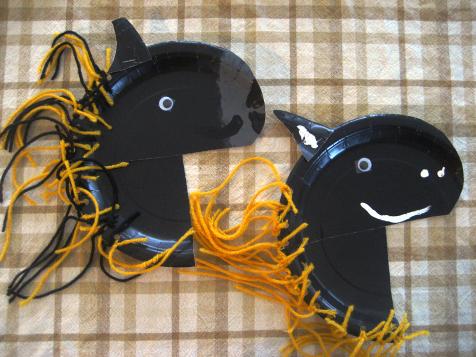
PAPER PLATE HORSE HEAD:
Materials: paper plate (I had originally envisioned this craft with white paper plates but on our Theme Day I didn’t have any so we used black ones instead), hole punch, glue stick or tape (I think tape works best—either regular folded over or double sided), yarn, paint or markers (we had to use paint as markers wouldn’t show on a black paper plate), googly eyes, stapler.
Step 1: Cut the paper plate in half and then round one end of one half to be the horse’s nose. Use the small piece of paper you cut out and shape that into an ear. Step 2: Fit one half on top of the other so that it forms the shape of a horse’s head. The uncut half is the neck and the cut one is the head and attach together using either glue or tape (we used double sided tape). Step 3: Have your child glue or tape a googly eye to the head. Step 4: Help your child staple the ear (small piece of paper plate cut out from step 1) to the head as well. Step 5: Help your child hole punch along the “neck” of the horse. Step 6: Have your child decorate the horse with markers or paint. Add a nostril or a mouth or even spots. Encourage your child to be creative. Step 7: Cut out pieces of yarn to fit in the hold punch holes. We found two pieces of yarn per hole made for a nice shaggy mane. Have your child feed the string through the hole. If your child is capable have them tie the yarn onto the paper plate using a knot. My kids struggled with this step (even the 11 year old) so I ended up tying ALL the strings. This step took some time!
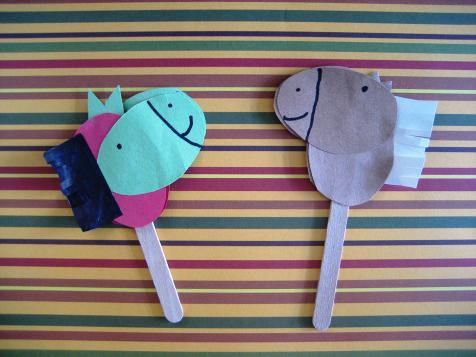
MINI HOBBY HORSE:
Materials: Popsicle stick, coloured paper, glue (and double sided tape works, too), markers.
Step 1: Have your child choose the colours for the horse in this craft. I preface the choice by saying this is a miniature toy so you can choose bright colours. My Eldest, ever the practical one, still chose brown, but my Youngest opted for a brighter horse. Step 2: Layer the paper choices and then cut out 4 ovals per horse (2 for the neck, 2 for the head). Use the popsicle stick as a bit of a guide to determine the size you want. Step 3: Apply glue to one of the ovals to be used as the neck and lay the popsicle stick on it. Then glue the other oval over top to sandwich the popsicle stick. Step 4: Have your child glue the other oval sideways on to the neck and then flip the stick over to glue the other oval over top in the same spot (this makes the craft double sided). Step 5: Cut out some ears and have your child glue them to the horse head. Step 6: Have your child pick a colour for the mane and cut out a simple rectangle that will fit on the long oval neck. Cut little slits leaving the bottom of the rectangle intact to create the mane and then have your child glue the main onto the horse. Step 7: Give your child the markers to draw the horses eyes, nostril, and mouth onto both sides.
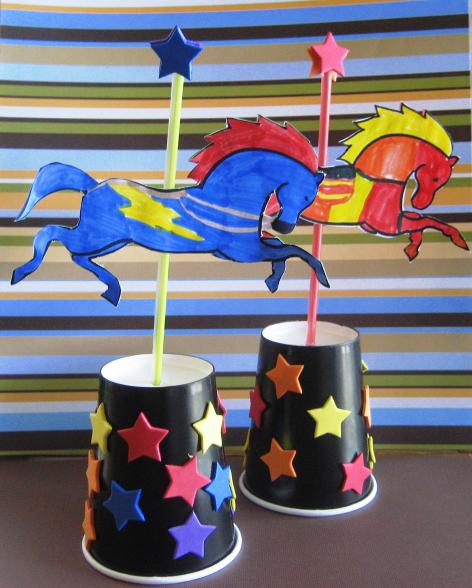
PAPER CUP CAROUSAL HORSE:
Materials: A copy of my Horse Template Printable, a paper cup, stickers or markers to decorate, a straw, markers, child safe scissors, glue stick, tape.
Step 1: Have your child colour the Horse Template Printable to look like a colourful carousal horse. I showed my boys photos of carousals to give them ideas before hand. Step 2: Glue the colouring sheet to a piece of construction paper. This makes the craft a bit more sturdy. (This could be optional). Then cut the horse out. You may have to help youngest kids as the details with the legs can be tricky to cut out. Step 3: Tape the carousal horse to a straw which will be the pole of the carousel. Step 4: (Adult Step) Pierce a hole in the bottom of the paper cup. Step 5: Insert the straw into the hole in the paper cup (I insert the bendable end) and then as best you can tape it to the inside of the cup to keep it in place . (This could be optional). Step 6: Encourage your child to decorate the cup. We had black cups so we opted for stickers but a white cup could be coloured with markers or even painted different colours. Step 7: (Optional) we sandwiched two stickers to the top of the pole (straw) to give it a more complete look.
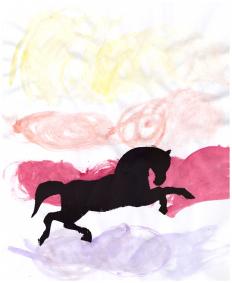
SILHOUETTE OF A HORSE RUNNING:
Materials: A copy of my Horse Template Printable, white paper, paint brushes, soft craft sponge (from a craft store or use make up sponges. Don’t use kitchen sponges for this craft as they are too hard), water colour paints, black paint, wax paper, newspaper or plastic to cover your work area, art smock or old clothes to wear while painting, child safe scissors, glue stick, cutting board, craft knife (adult use only).
Step 1: Have your child paint (with watercolours) the white paper using sunrise or sunset colours. This is the background for this craft. Step 2: (Adult step) While your children are doing this (or beforehand as prep work) lay the Horse Template Printable onto a cutting board and use a sharp craft knife to cut out the horse. I made two stencils this way. I kept the mane on one of the horses and then wanted to see what it would look like if I didn't include the mane on the second. Carefully remove the paper horse and what your are left with is a flimsy stencil of a horse. You could trace this onto construction paper to create a sturdier stencil for multiple use if you wanted to. Step 3: When the background painting is reasonably dry have your child lay the stencil of the horse on top of the page where he/she wants the horse located. Help younger kids to hold this paper steady in place and then show them how to dip the sponge into the black paint (I put a blob of black paint onto wax paper but you could use a paint pallet or a paper cup) and then stamp the sponge onto the hole in the stencil to create a horse shape onto your child’s background. Step 4: Carefully lift the stencil sheet and voila you have a beautiful silhouette of a horse running. My boys really liked the look of this craft! Step 5: Let the paint dry and then display or glue into your Family Theme Day Scrapbook.
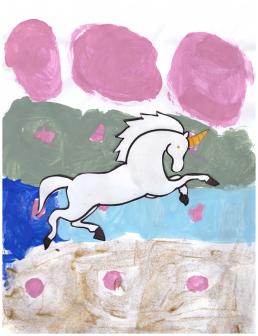
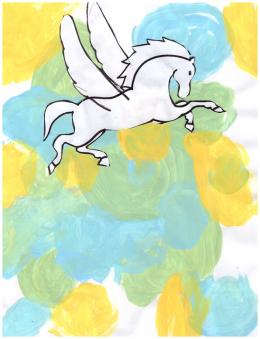
MAGICAL HORSES:
Materials: A copy of my Horse Template Printable, markers, white paper, paint brushes, paints in “Magical” colours, wax paper or paint pallet, newspaper or plastic to cover your work area, art smock or old clothes to wear while painting, child safe scissors, glue stick.
Step 1: Have your child pick out “Magical” colours to paint the background. Step 2: Give your child a copy of the Horse Template and encourage him to turn it into a magical horse like a Pegasus or an unicorn. Step 3: Help your child cut out the magical horse and then have him/her glue it to the background. Step 4: Display or glue it in your Family Theme Day Scrapbook..
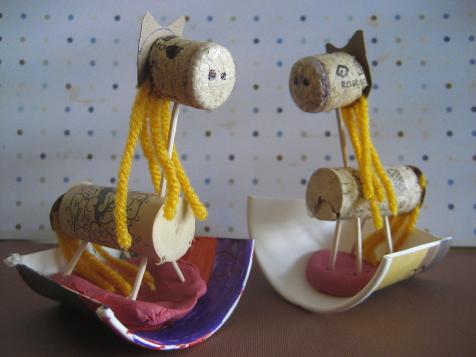
ROCKING HORSE CRAFT:
NOTE: Older kids might like this one but I don’t think it would suit younger ones, especially since the toothpicks can be dangerous.
Materials: Corks, sharp toothpicks, clay, paper cup (we used mini cups), permanent marker, white glue, yarn, brown construction paper.
Step 1: Help your child cut a cork in half. Be careful! Step 2: Have your child draw eyes on one half of the cork and two nostrils on the uncut end. Step 3: Stick a tooth pick into the half cork as a neck and then stick it into another full cork as the body. Step 4: stick four sharp toothpicks into the body cork as the legs. Carefully break off the tops of each toothpick to make them a better size for the legs. Step 5: Cut a paper cup in half lengthwise so that you create a rocking half cup. Have your child decorate the cup if he/she chooses. Step 6: Flatten some play clay and press onto the open part of the cup. You could also glue it if you want a more permanent craft. Step 7: Lay a piece of wax paper out. Cut some yarn into small pieces to be the mane and the tail. Step 8: Trace the bottom and top of the cork onto brown construction paper to create two circles and cut them out. Step 9: Apply glue to the cut end of the smaller piece of cork (not the nostril end) and lay the yarn mane in the glue. Then sandwich the yarn to the cork with a small circle of construction paper. Do the same with the tail. Apply white glue, lay the yarn like a tail and then sandwich with a circular piece of construction paper. Step 10: Let the white glue dry on the wax paper. This takes a while...about a day. Step 11: When the glue is dry press the toothpick feet into the clay base of the craft. Your horse is now ready to rock!
DRAWING HORSES:
NOTE: Besides reading about horses, I adored drawing them when I was younger. If your kids like to draw and love horses use this theme day to encourage some equine drawings.
FUN CHALLENGE! Can your family come up with another craft using our Horse Template Printable? If so email us a photo at info@familythemedays.ca. We’d love to hear about it!
FOOD:
BREAKFAST:
Cowboy Egg in a Hole – check out the breakfast I made for our Cowboy Theme Day.
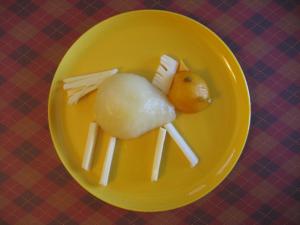
SNACK:
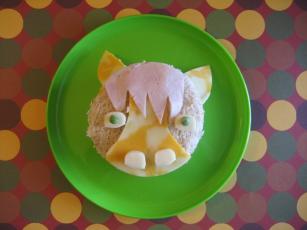
Horse Fruit Salad: Ingredients: Canned pear, canned apricots, mozzarella cheese string, raisins, cheddar cheese. Step 1: Arrange the pear on the plate with the apricot as the horse’s head. Step 2: Arrange raisins for the eyes and chop a raisin to be the nostrils. Step 3: Cut some cheese into an ear shape and add to the head. Step 4: Cut a cheese string in half and then split those lengthwise to be legs and arrange them as thus. Step 5: Cut another cheese string in half and then pull some of the cheese back to make a shaggy tail and then add it to the plate. Step 6: Use the other half of that cheese string to be the main and chop some fringe along one side to make that shaggy. Place that near the head. Step 7: Enjoy!
LUNCH: Horse Inspired Sandwich: I found this idea on Pinterest. Here is the original link: http://www.recipe.com/blogs/cooking/kids-lunch-recipe-horsey-sandwich/?socsrc=recpin041813horsesandwich Horseshoe Breadsticks:
Ingredients: refrigerated pizza dough, seasonings (see options below), dip (see options below).
Step 1: Rollout the dough and cut into strips. Then have your kids arrange them on cookie sheet in a horseshoe shape. Step 2: Let your kids choose the flavour...Italian or Mexican or Mediterranean or Sweet. For Italian sprinkle parmesan cheese and dried Italian herbs (like oregano and basil) onto the breadsticks. For Mexican sprinkle chili pepper. For Mediterranean sprinkle cumin. For Sweet sprinkle cinnamon. (We made Italian in the photo on the right). Step 3: Bake for about 13 minutes or until lightly golden. Step 4: Prepare dips. For Italian mix in Italian herbs with canned tomato sauce and heat up as a quick pizza dipping sauce. For Mexican use salsa. For Mediterranean make some hummus (use a food processor to mix chickpeas, lemon juice, olive oil, salt, a smidge of garlic, and yogurt). For Sweet use applesauce as a dip. Step 5: Once the breadsticks have cooled a bit dip in an enjoy!
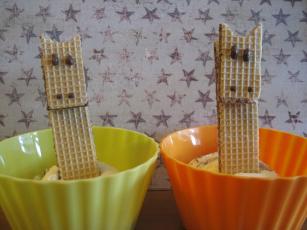
DESSERT: Wafer Cookie Horse and Ice Cream: Make the horses by carefully cutting a rectangular chocolate wafer cookie in two pieces—one piece longer than the other. Carefully trim away a bit of the smaller half of the cookie to be the ears of the horse head. Melt some chocolate in the microwave (in 30 second intervals) and then scoop in a resealable bag. Cut a small bit of the corner of the bag to use as a piping bag and squeeze the melted chocolate out to use like icing to decorate. Dab little chocolate eyes and nostrils to the “horse head” cookie and then squirt a big blob onto the top of the longer cookie to stick the head onto it. Arrange these on a plate and then put in the fridge to harden and stick together. When they are ready put a scoop of ice-cream into a bowl (we used chocolate marble) and gently press the horse cookie into the ice cream so the neck sticks out! Yum! Rocking Horse Sugar Cookies: I found a cute rocking horse cookie cutter and plan to make and decorate some of these soon. Check our More Goodies Facebook Page to see a photo: https://www.facebook.com/media/set/?set=a.510290308998454.127299.194379807256174&type=3
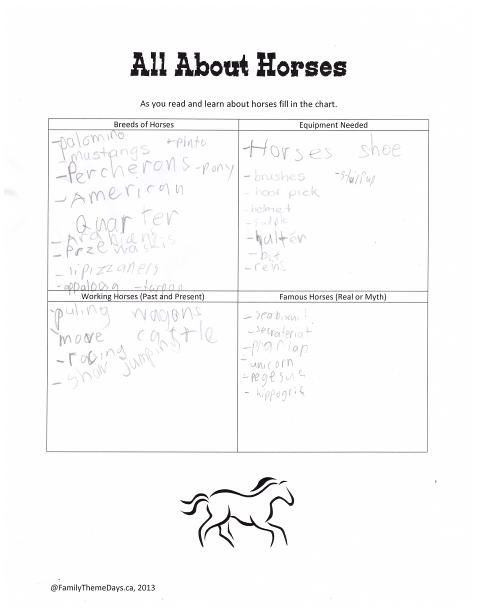
LEARNING ACTIVITIES: CHART: Print out my All About Horses Chart and together as a family, as you read and learn about horses, fill in the chart. PARTS OF THE HORSE: If you have found a good nonfiction book from the library that has the parts of the horse use it as a reference for this learning activity. Print out a copy of my Horse Template Printable and have your child colour the horse with crayons or markers. Help your child cut the horse out and then glue it to a piece of paper or in your Family Theme Day Scrapbook. Now have your child use the book as a reference and label the parts of the horse. For a picture of this learning activity check our More Crafts and activities Page on Facebook: https://www.facebook.com/media/set/?set=a.536331356394349.132868.194379807256174&type=3 WEBSITE: For some more information about horses try this site: http://animals.nationalgeographic.com/animals/mammals/horse/ For more horse facts try here: http://www.sciencekids.co.nz/sciencefacts/animals/horse.html For games, stories, quizzes about horse try this kid friendly site: http://horses4kids.com/
FOR FUN: TOYS: If your child has any plastic horse toys or a rocking horse or any other horse type toy today would be a great day to play with them.
GAMES: Go outside and play a game of horse shoes today! JOKES: Q: What did the pony say when he had a sore throat? A: I’m a little hoarse.
Q: What do you call a horse that lives next door to you? A: Neigh – bour!
EXTENDED ACTIVITIES: AUDIO VISUAL: Search through your child’s DVD/ video collection (or visit your local library before hand or the Video Store) to find your child’s favourite shows with horses in them.
For a cartoon movie about horses try:
· Spirit: Stallion of the Cimarron
There are many live action films about horses. Here are a few titles:
· Black Beauty · Dreamer · Flicka · Summer of the Colt
FIELD TRIP:
If you live near a farm or ranch or are vacationing somewhere that offers them, horse back riding and trail riding is a lot of fun.
Visit a farm with horses or a petting zoo with ponies.
Don’t want to see a real horse? Then visit a local carousal or merry-go-round for something fun.
|

|
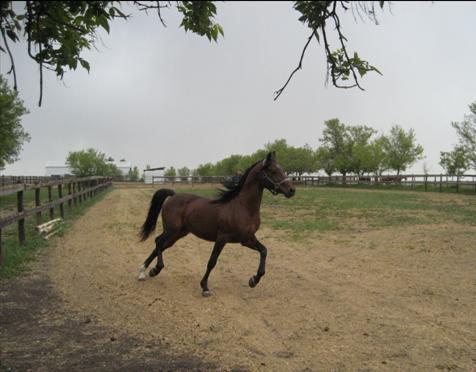
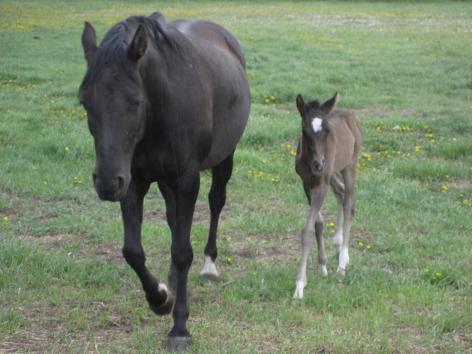
“The wind of heaven is that which blows between a horse's ears.” ~Arabian Proverb |
|
Photos by: C Wright |
|
Horse Coloring Page Printable |

|
Journaling about Horses |

|
Collage using stamps |


|
Simple Clothespin Horses |

|
Paper Plate Horse Head Craft |

|
Popsicle Stick Hobby Horse Craft |

|
Carousel Horse Craft |

|
Horse Silhouette Art |

|
Magical Horses Art |
%20-%20with%20free%20printable)
|
Cork Rocking Horse |

|
Horse Inspired Foods |

|
All About Horses |

|
|

|
|
|
|

|
Visit some horses! |
|
Photos by: C Wright |