|
Christmas If your family celebrates Christmas use this Theme Day as a fun way of preparing for the big day. It also works well during school holidays to combat boredom. If your family does not celebrate Christmas you can still do some of the activities for the Theme Day but you could focus on learning about other cultures as a way to promote understanding. Print out the Family Theme Day Planner and decide which activities you’d like to do.
INTRODUCTORY DISCUSSION: Christmas is the Christian celebration centered on the birth of Christ. You can keep Christ in Christmas by teaching your children to focus on giving instead of receiving. Use the crafts found in this Theme Day Plan as gifts to reinforce this idea. Also, our Spirit of Christmas box highlights the true meaning of Christmas. Christmas is also a day rooted in different traditions around the world. Many traditions involve Santa Claus or Saint Nicholas and it is interesting to see how different countries have their own stories about the generous man called Father Christmas.
SONGS: There are many Christmas carols sung around the world. Listen to some family favourites on this Theme Day. Check this site for the origins of many Christmas carols including their lyrics: http://www.carols.org.uk/ This site has the lyrics for many carols and plays the tune as well: http://www.the-north-pole.com/carols/index.htm
SCRAPBOOK ACTIVITIES: Colouring pages: You can find many free coloring pages online by using your favourite search engine and typing in “Christmas coloring page” or print out my Merry Christmas Coloring page.
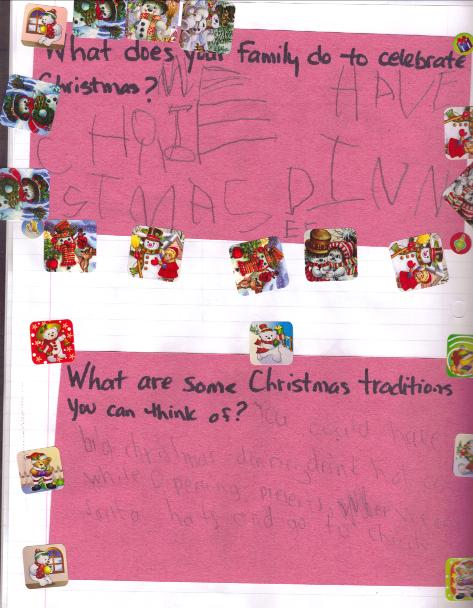
Journaling Question Prompt: Write out one or more of the following questions in the family notebook or on a coloured piece of paper: Does your family celebrate Christmas? What does your family do to celebrate Christmas? What are some Christmas Traditions that you can think of? What is your favourite thing about Christmas? What does Christmas mean to you? Choose the level of your child: ¨ Toddler – discuss the answer(s) out loud first and have your child draw a picture of the answer ¨ Preschooler/kindergartener – discuss the answer(s) out loud first and write the answer down for him/her leaving one word for him/her to write out himself/herself with your help. You could also encourage him/her to draw a picture as well. ¨ Early grade school – have your child either write out the answer himself/herself (encourage phonetic spelling) without your help, or offer to help with spelling each word out loud one word at a time. ¨ Grade school – have your child write a sentence or two on his/her own and then read over and discuss the response. (You decide whether to correct the spelling or not) ¨ Older child – have your child write a longer response (paragraph). ¨ As a challenge – instead of a question ask your older child to write a story or a poem about Christmas. PUZZLES: Print out a Christmas Word Search: Easy Christmas World Search or Moderate Santa Word Search or Difficult Christmas Word Search Check here for answer keys: Easy Christmas Word Search Answer Key and Moderate Santa Word Search and Difficult Christmas Word Search Answer Key BOOKS:
Raid your child’s bookshelves to find any Christmas related material. Go to the library with your child to find some Christmas books. Go to the library on your own to find books about Christmas (both fiction and nonfiction) to have already on hand for your theme day. Many libraries allow you to go online and search for titles based on subject (Search for “Christmas” under “Children’s Books”). Reserve them if you can to save time.
Here are some non-fiction books about Christmas:
· O Christmas Tree: Its History and Holiday Traditions, by Jacqueline Famer and illustrated by Joanne Friar, Charlesbridge, 2010 – This book looks at the history of the Christmas tree.
· Celebrate Christmas, by Joanne Mattern, Enslow Publishers Inc., 2008 – Older children might enjoy this book as it goes into more detail about the history of Christmas as well as its cultural significance and symbols etc..
· Christmas Around the World, by Mary D. Lankford and illustrated by Karen Dugan, Morrow Junior Books, 1995 – This book gives a one page description of Christmas in 12 different countries and includes some craft ideas at the back.
· Christmas in Switzerland, from the Christmas Around the World, World Book series, World Book Inc., 1995 – This would be good for older siblings who might be interesting in focusing on a different country and learning about Christmas in that country. There is a lot of writing and photographs and even a section at the end with Swiss crafts and recipes. Other books in this series that we looked at were: Christmas in Ukraine and Christmas in Canada.
· Joy to the World: Christmas Stories Around the World, by Saviour Pirotta and illustrated by Sheila Moxley, Harper Collins Publishers, 1998—This book has five different Christmas stories (from Syria, Malta, Mexico, Ghana and Russia) from around the world offering something different for the family.
· Why is This Festival Special? Christmas, by Jillian Powell, Smart Apple Media, 2005 – This book, with easy text and lots of photographs would be a good one to use if your family doesn’t celebrate Christmas and are interested in learning about it.
Here are some picture books about the birth of Christ:
· The Christmas Story, retold and illustrated by Carol Heyer, Scholastic Inc., 1991 – Heyer’s beautiful acrylic paintings accompany this retelling of the birth of Jesus.
· Santa’s Favourite Story, by Hisako Aoki and illustrated by Ivan Gantschev, Aladdin Paperbacks, 1997 – Santa tells the animals the story of the first Christmas in this beautifully illustrated book.
· The Stable Where Jesus Was Born, by Rhonda Gowler Greene and illustrated by Susan Gaber, Scholastic Inc., 1999 – Beginner readers will like this rhythmic and repetitive retelling of Jesus’ birth.
· Star of Wonder, by Leena Lane and Elena Baboni, Abingdon Press, 2007 – I love the colourful illustrations in this book about the birth of Christ.
Here are some other Christmas picture books:
· Christmas Long Ago from A to Z, by Bobbie Kalman, Crabtree Publishing Company, 1999 – This book looks at Christmas traditions from the nineteenth century alphabetically.
· Mrs. Clause Explains it All, by Elisabeth Claus and illustrated by David Wenzel, Jabberwocky, 2008 – Mrs. Claus answers questions posed by children in letters to Santa.
No list of Christmas books would be complete without these titles:
· How the Grinch Stole Christmas, by Dr. Seuss, Random House, 1957 – This rhyming tale of the grouchy Grinch is a must read in our house every Christmas.
· The Night Before Christmas, by Clement C. Moore and illustrated by Mary Engelbreit, Harper Collins Publishers, 2002 – There are many different illustrated books for this famous poem by Moore. In our family copy Engelbreit’s bright pictures add to the magic.
CRAFTS:
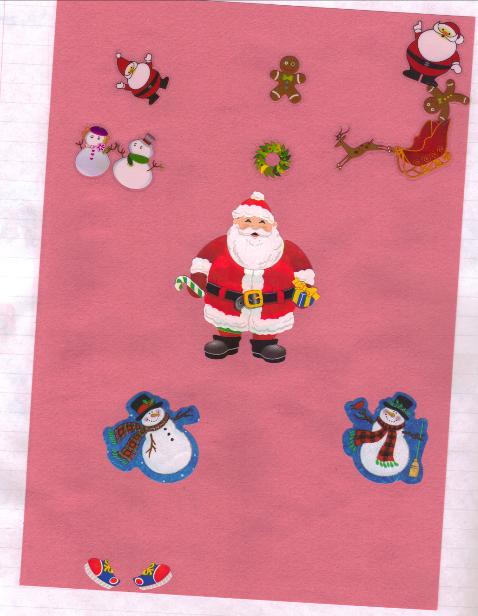
CHRISTMAS STICKER COLLAGE:
Materials: Coloured paper, stickers with various animals on them, markers and crayons (optional).
Step 1: Give your child the stickers and paper and have him/her either make a scene or a collage with them. Step 2 (Optional): See if your child wants to embellish the picture with markers or crayons by drawing a setting for the animals.
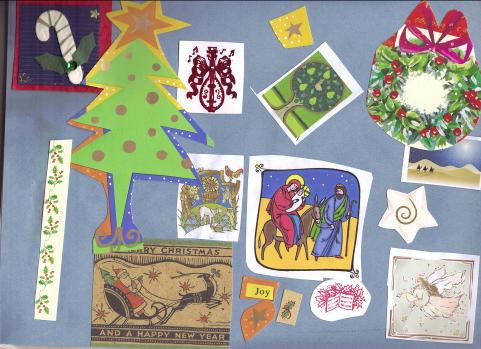
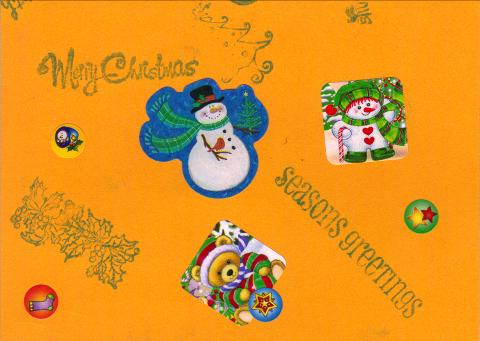
RECYCLED CHRISTMAS CARD COLLAGE:
NOTE: There are many ways you can recycle old Christmas cards. They make great gift label simply by cutting out the pictures and writing on the back (or gluing to coloured paper beforehand if there is writing on the back side of the picture) and then you add a hole punch to string a ribbon through. Another way to re-use the cards is to have your kids make the following card collage .
Materials: Old Christmas cards, stickers, wrapping paper, child safe scissors, coloured paper, glue stick, damp cloth for sticky fingers, (Optional) crayons or markers or pencil crayons.
Step 1: Have your child cut out pictures from old Christmas cards or from wrapping paper scraps (or help younger children). Step 2: Have your child glue the assorted pictures to a piece of coloured paper using a glue stick. Step 3: (Optional) Let your child decorate or embellish the collage using crayons, markers or pencil crayons.
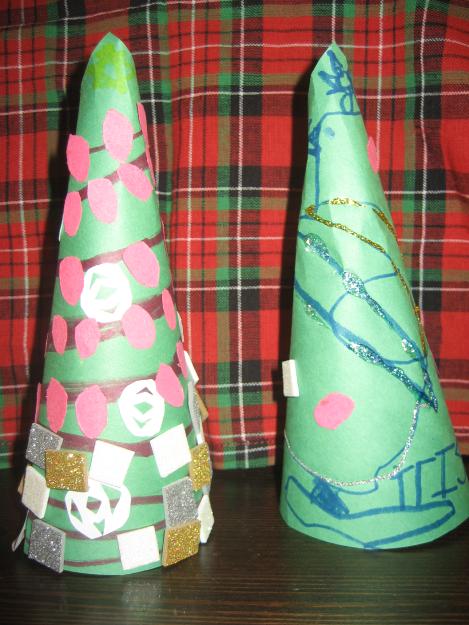
PAPER CHRISTMAS TREES: NOTE: The tradition of decorating an evergreen tree at Christmas started in Germany in the 16th Century. Show your child where Germany is using an atlas, globe or on-line.
Materials: A plate (for tracing), green Paper, tape, markers, stickers, glitter glue, etc.
Step 1: Trace a circle onto a piece of green paper using a pencil and a plate. Step 2: Cut out the circle and then cut a slit just to the middle. Step 3: Have your child decorate the paper using markers, crayons, stickers, glitter glue etc. to represent the decorations on the Christmas Tree. Step 4: Roll the green paper to make a cone shape and tape it in place. Step 5: Use as a table center piece!
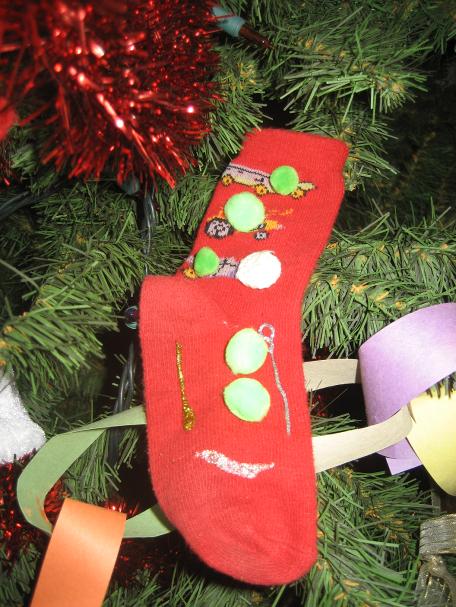
SOCK STOCKING ORNAMENT: NOTE: The Christmas stocking is a European tradition that has many stories of origin including the use of shoes instead of stockings or socks. Materials: An old children’s sock (If you’re like me you’ve probably got some lone socks stored somewhere), glitter glue, fabric paint (optional), white glue, sequins, coloured felt, marker, scissors (sharper ones to be used by adults to cut the felt), needle and thread. Step 1: Let your child decorate the sock using glue and craft supplies, glitter glue, and fabric paint (this one is optional). Step 2: Let the sock dry. Step 3: (Adult step) Use a needle and thread to make a loop of thread so the ornament can hang on your tree.
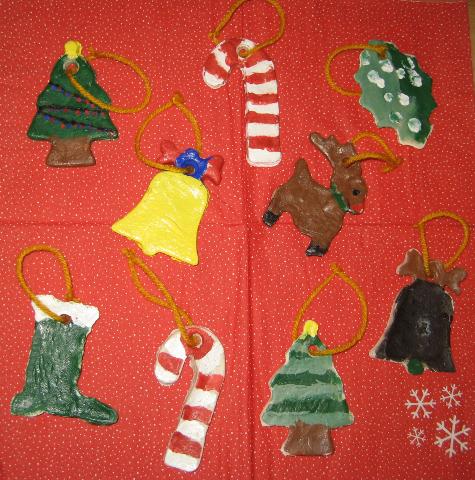
CLAY CHRISTMAS TREE ORNAMENTS: NOTE: This craft takes some time and really is a project that could be spread out over three days (bake, paint, seal) but it is worth the effort as it makes some great gifts! Materials: 1 1/4 cups of warm water, 1 cup of salt, 3 cups of flour, Christmas cookie cut outs (or use star cut outs), a rolling pin, a pen lid, acrylic paint, art smock or old clothes to paint in, newspapers or plastic to spread out on the table, white glue, an old paint brush, yarn. · Step 1: Mix the water and salt in a bowl. · Step 2: Add the three cups of flour and mix together with your hands. Then knead until the mixture is formed into a smooth ball. If the dough is dry add more water; if the dough is too wet add more flour. · Step 3: Preheat the oven to 200°F (93°C) and place parchment paper onto your cookie sheets. · Step 4: Roll out the dough using a rolling pin (you should add flour to the counter top so the dough does not stick) and then let your child press the cookie cutters into the dough to make the ornaments shapes. · Step 5: Take the pen lid and press it into the dough where you would like a small hole to be for the yarn (to hang the ornaments up). · Step 6: Place the cut shapes onto the prepared cookie sheet and bake in the oven. Times will vary depending on the thickness of your ornaments mine took over and hour. Let the ornaments cool before the next step. · Step 7: Have your child paint the ornaments using acrylic paint. Place decorated ornaments onto wax paper to dry and leave them to dry before you move on to the next step. · Step 8: (Optional but recommended) Mix equal parts white glue and water together (we put ours in a paper cup) to make the sealant. You don’t need to do this part but it does make the ornaments more durable. · Step 9: Paint the glue mixture over the dried decorated ornaments and place them on waxed paper. We did this in two stages. We painted the back first with the glue mixture (I had my kids write their names on the back using permanent marker and then added the year). Then we let them dry. My youngest wanted to dry them with the hair dryer on low which sped up the process a bit. Afterwards we painted the front and sides with the sealant and placed them on new waxed paper to dry. · Step 10: Tie some yarn through the hole in each ornament to make a loop. Now you have some great keepsake ornaments to safe and give away!
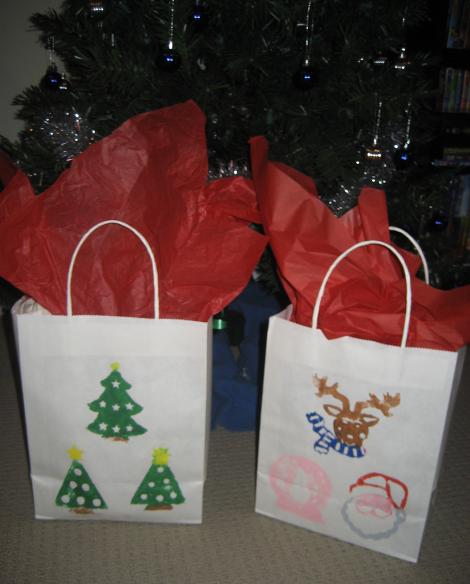
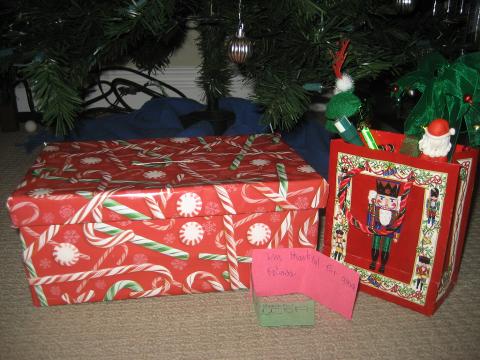
CHRISTMAS CARDS: NOTE: Use this craft idea to make unique cards for special relatives or for teachers. Materials: Black cards (found at craft stores) or just use coloured paper cardstock, stamps, stickers, crayons, markers, spare pieces of wrapping paper or scrapbook paper. Step 1: Give your child the craft supplies and the blank card and have him/her decorate the card in a unique way. The older your child the more creative he/she can be. Some simple ideas are to just use stickers or glue pieces of wrapping paper onto the cardstock. You could also have your child paint the cards or use paint and a craft stamp or stencil from a craft store. Use what you have on hand. GIFT BAGS: Materials: Plain brown or white gift bags (you could also use plain paper gift boxes), paints and brushes, paint stencils or stamps (optional, but this is what we used), art smock or old clothes to wear while painting, newspapers or plastic to cover the table you will be working at. Step 1: Let your child decorate the gift bags using the paints and stamps (as we did) or simply by painting their own Christmas scene. Lay the bag flat (not opened) and paint one side only. You can paint the other side later on when the first side is dried. Another good idea is to have your kids paint handprints onto the bags in Christmas colours. This makes a great gift bad for Grandparents. SPIRIT OF CHRISTMAS BOX: NOTE: I had my kids make this craft so we could all focus on the real meaning of Christmas. We keep different envelopes with the notes in them from previous years and we enjoy reading the old notes when the box comes out each year. It is fun to see the change in writing abilities and the funny things my boys wrote when they were younger. On Christmas morning we read the current year’s notes out loud before opening gifts. Materials: Wrapping paper, scissors, an old shoe box with a lid, tape, coloured paper (we use green and red). Step 1: Wrap a shoe box in wrapping paper making sure to wrap the lid separately so that it can be removed. Step 2: (Adult step) Carefully cut a slit on the shoe box lid so that slips of paper can be slide through it. Step 3: Have your kids cut out slips of coloured paper to be used as notes. Step 4: Find a place to store the slips of coloured paper. We use a small gift bag, but you could decorate a smaller box to hold the paper as well as a pen. We have a special Christmas pen that we use. Step 5: Every day at dinner, leading up to Christmas, we each write on a slip of paper. We write either a good deed or something we are thankful for. Help younger children to spell the words or write them down for him/her (do encourage little ones to draw scribbles though). Step 6: Put the slips of paper into the box and on Christmas day read the notes out loud to the family to remind everyone that Christmas isn’t about the gifts it is about love and what we give.
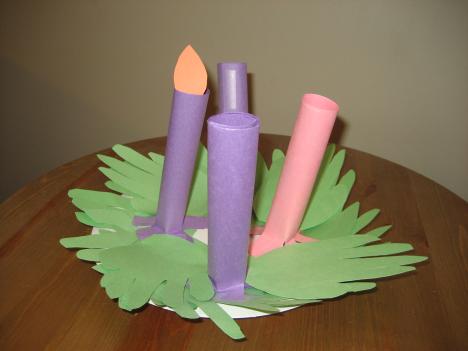
ADVENT WREATH: NOTE: Advent is a Christian tradition that counts down the four weeks of Advent , which is the time of waiting and preparation for the celebration of the birth of Jesus. Materials: Green paper (a few sheets), glue stick, pink paper, purple paper (2 sheets), orange paper, child safe scissors, tape, paper plate. Step 1: Trace your child’s hands onto a few pieces of green paper. We found that 10 hands worked for the base and used 4 more to hide the tabs. Step 2: Help your child cut the hands out. Step 3: Help your child glue the hands onto the paper plate to from a circle which will be the wreath and the base for the paper “candles”. Step 3: Cut the purple paper in half to form two rectangles per page. Roll three of these rectangles into a cylindrical shape to represent candles. Step 4: Cut the pink paper into a similar sized rectangle and roll that to be a forth “candle”. Step 5: Cut about 4 or 5 small slits at the bottom of each “candle” and fold out. Apply glue to these folds and then press onto the wreath. You may want to hide these folds using more green hand prints if you like. Step 6: Cut out four flame shapes from the orange (or yellow) paper and set aside. Each Sunday of advent you can have your child “light” the candle by taping the orange flame to a candle. Traditionally the pink candle is “lit” for the third week of advent.
OTHER: There are always many different Christmas Craft Kits found at craft stores, including stamps, stencils, foam and wooden ornament kits. If you are looking for a craft book with different ideas try this title: Christmas Crafts from around the world, by Judy Ann Sadler and illustrated by June Bradford, Kids Can Press, 2003.
WRITING ACTIVITY: Write to Santa to this address and he just might write your child a letter in return: Santa Claus North Pole Canada HOHOHO
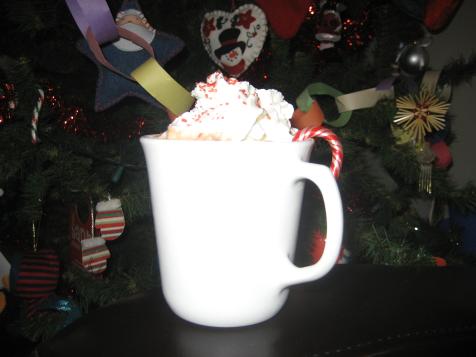
FOOD: To find some Christmas food around the world check here: http://en.wikipedia.org/wiki/List_of_Christmas_dishes SNACK: Candy Cane Hot Cocoa: Make your favourite Hot Chocolate recipe in a saucepan and add crushed candy canes, stirring until they melt into the drink. Top with whipped cream and another candy cane! Make it fancy with sprinkled red sugar as well. Hot Apple Cider: make an easy hot apple drink by mixing 1 quart of apple juice with ½ tsp of cloves, 1 cinnamon stick and 2 tbsp of brown sugar and heat. Pour through a sieve or colander to catch the cloves and cinnamon sticks (or tie them up in cheesecloth when you put them in the juice for easier removal). Make a favourite appetizer for your family’s Christmas holiday celebration (like a dip, cheese ball, crostini...) LUNCH: Bagel Wreaths – Spread cream cheese onto each half of a bagel and add small diced pieces of red and green peppers to create two festive wreaths that you can eat! DINNER: If you attend a Christmas Dinner use this Theme Day to choose and/or prepare a side dish to bring along. DESSERT: Make a Bûche de Noël (which is a traditional Christmas cake made to look like a log in France, Beligum, Canada and Lebanon. Bake your favourite holiday treat: fruit mince pies, shortbread, sugar cookies (use Christmas cut-outs), gingerbread people, squares, etc.
LEARNING ACTIVITIES: WHERE IS Bethlehem? Take out a globe or atlas (or look on Google Earth) for Bethlehem to see how far away it is from where you live. CHARITY: There are many different charities working during the holiday season collecting money or gifts. One that we like is Operation Christmas Child. Check here for USA: http://www.samaritanspurse.org/index.php/OCC/ and here for Canada: http://www.samaritanspurse.ca/Operation-Christmas-Child/default.aspx
WEBSITE: For information on the history of Christmas check here: http://en.wikipedia.org/wiki/Christmas This site has lots of information about how Christmas is celebrated in many countries (74) and includes how to say Merry Christmas in over a hundred different languages: http://www.santas.net/aroundtheworld.htm This site has information on how Christmas is celebrated in 32 countries: http://www.the-north-pole.com/around/ This site has information on how Christmas is celebrated in 42 countries and includes some activities as well (craft ideas, colouring pages, Christmas Letterhead): http://www.theholidayspot.com/christmas/worldxmas/index.htm
FOR FUN: WHERE’S SANTA?: Follow Santa’s journey around the globe on Christmas Eve: http://www.noradsanta.org/ JOKES: Q: What Christmas plant wanted socks for Christmas? A: MistleTOE!
Q: Why did Santa want to work in the garden? A: Because he wanted to hoe hoe hoe!
Q: What did Santa name his dog? A: Santa Paws!
KNOCK KNOCK Who’s there? Holly Holly who? Holly days are here again.
Q: What is the difference between the ordinary alphabet and a Christmas alphabet? A: The Christmas alphabet has No “L”! (Noel)
EXTENDED ACTIVITIES: AUDIO VISUAL: Search through your child’s DVD/ video collection (or visit your local library before hand or the Video Store) to find your child’s favourite Christmas shows. Try to find some of these titles: · Rudolph the Red Nosed Reindeer · Bob the Builder’s Christmas · Charlie Brown Christmas
COOKIE PARTY: You can either host a party where cookies are made in advance and then exchanged or host a party where the baking is done together. For children, making sugar cookies using Christmas cut-outs is fun and then they can be decorated using icing or candies.
GINGERBREAD HOUSE PARTY: Like the above cookie party this is a great one for a group of children especially as there are many kits available at grocery stores where the gingerbread is already made that include icing and candies or you can bake your own gingerbread and create your own masterpiece.
TRIM THE TREE: If your family puts up a Christmas Tree you can incorporate this activity into the Theme Day (or weekend).
OUTDOOR LIGHTS: Decorate a tree or your balcony or window in your front yard with lights and ribbons for a festive outdoor activity.
GIFT WRAPPING: If you exchange gifts with extended family have some fun together wrapping gifts (don’t forget to use the Christmas tags or cards you made as a craft).
CAROLLING: Get a group together and go door to door in your neighbourhood spreading holiday cheer by singing your favourite carols. FIELD TRIP: FESTIVALS: During the holiday season there are many carnivals or festivals to attend like outdoor light displays, tree decorating contests, Christmas craft sales, carolling, etc.. Search your community newspaper for something to attend as a family.
|

|
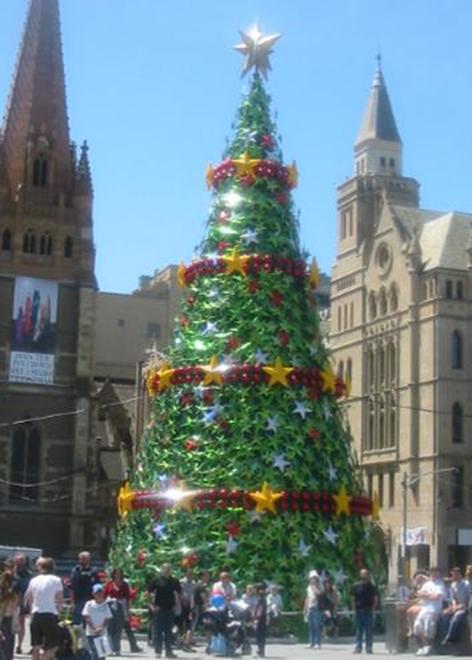
Christmas in Australia Federation Square, Melbourne |
|
Journaling |
|
Christmas Sticker Picture |
|
Recycled Christmas Card Collage |
|
Paper Christmas Tree Craft |
|
Sock Stocking Ornament |
|
A simple Christmas Card made with stamps and stickers. |
|
Homemade Clay Ornaments |
|
Homemade Gift Bags |
|
Spirit of Christmas Box |
|
Homemade Advent Wreath |
|
Candy Cane Hot Cocoa |

|
Christmas Cookies! Yum! |